Why single-leg strength matters more than you think

If you’ve ever noticed that one side of your body feels stronger than the other—whether you’re skiing, running, or lifting —you’re not alone. Uneven hip strength is extremely common and can unfortunately affect performance, balance and long-term joint health. Fortunately, targeted exercises can help correct these imbalances and improve how your body moves as a whole.

One of the most effective exercises for addressing side-to-side differences is the single-leg Romanian deadlift (RDL). This movement strengthens the glutes while also acting as a corrective tool, revealing weaknesses that may go unnoticed during traditional two-legged exercises. Because many daily activities and sports require you to stabilize on one leg at a time, training this pattern is key.

The single-leg RDL works from the ground up. It begins with creating a stable base through the foot while the glutes and hips work to keep the pelvis level as the opposite leg reaches back. When the pelvis stays even, movement becomes more efficient. When it doesn’t, the body compensates—often leading to reduced performance or discomfort in the lower back, hips or knees.

Before loading this movement, here’s a way to prepare the muscles and joints with mobility work and a simple progression.

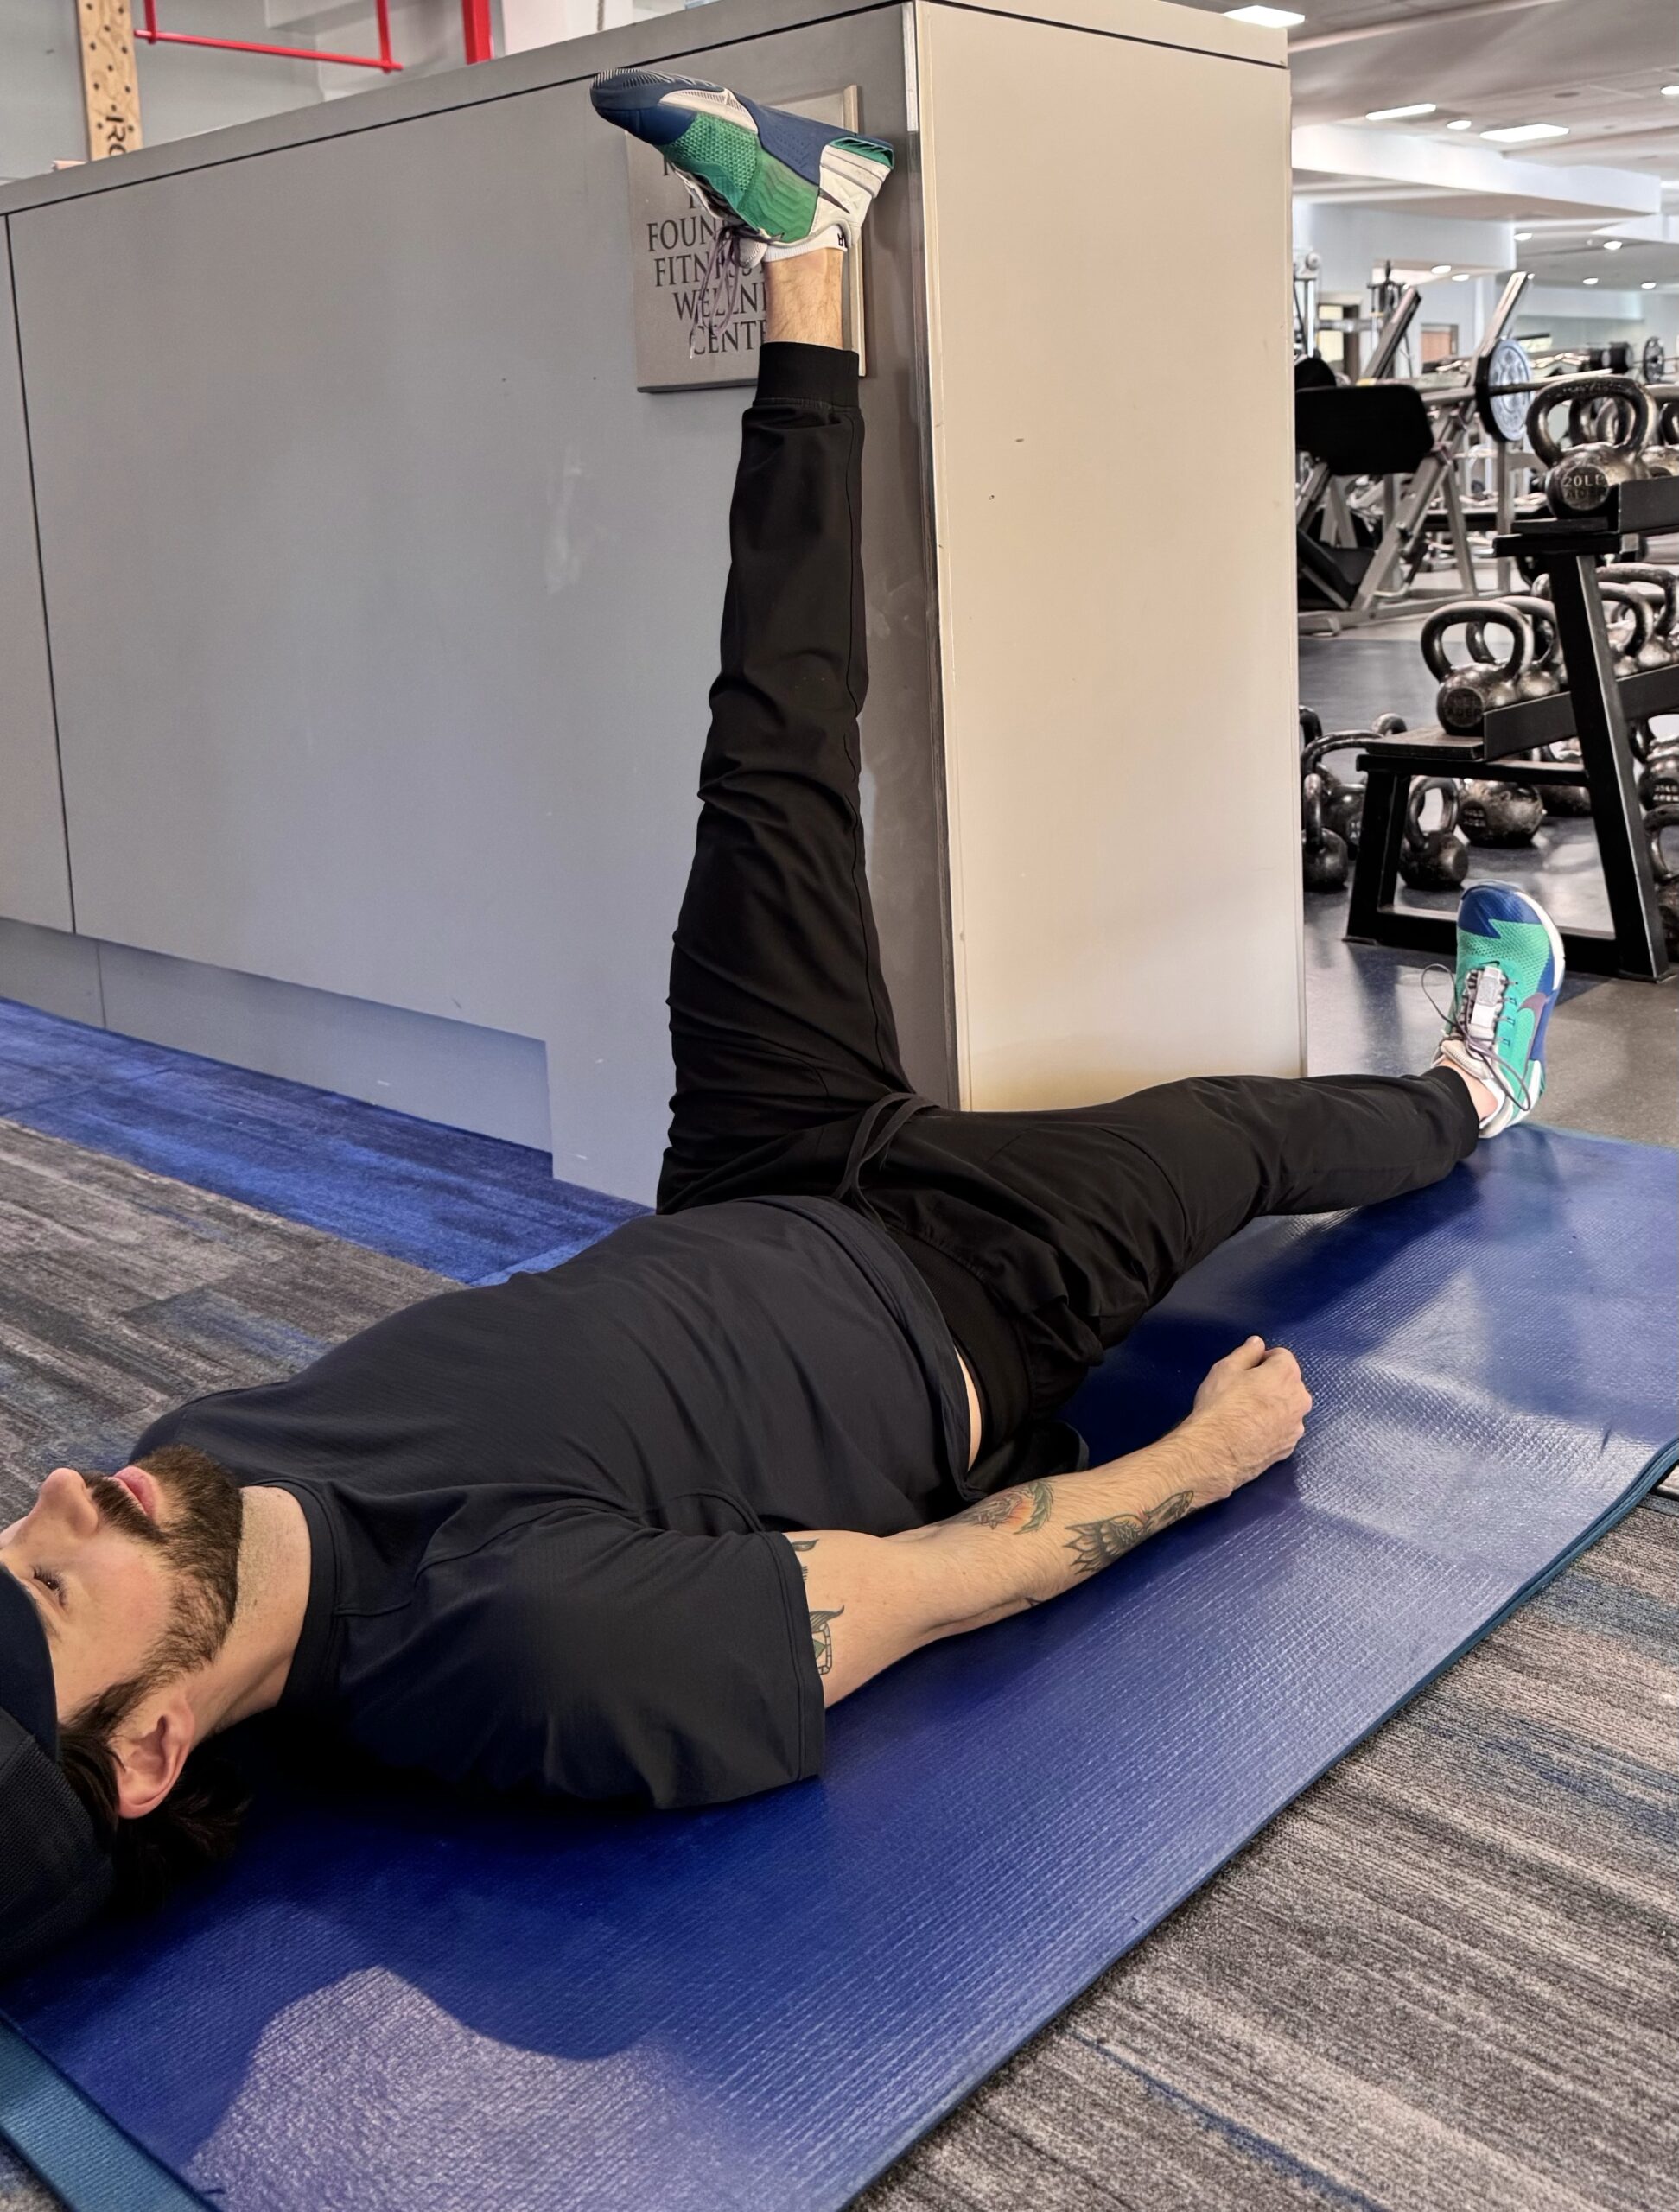
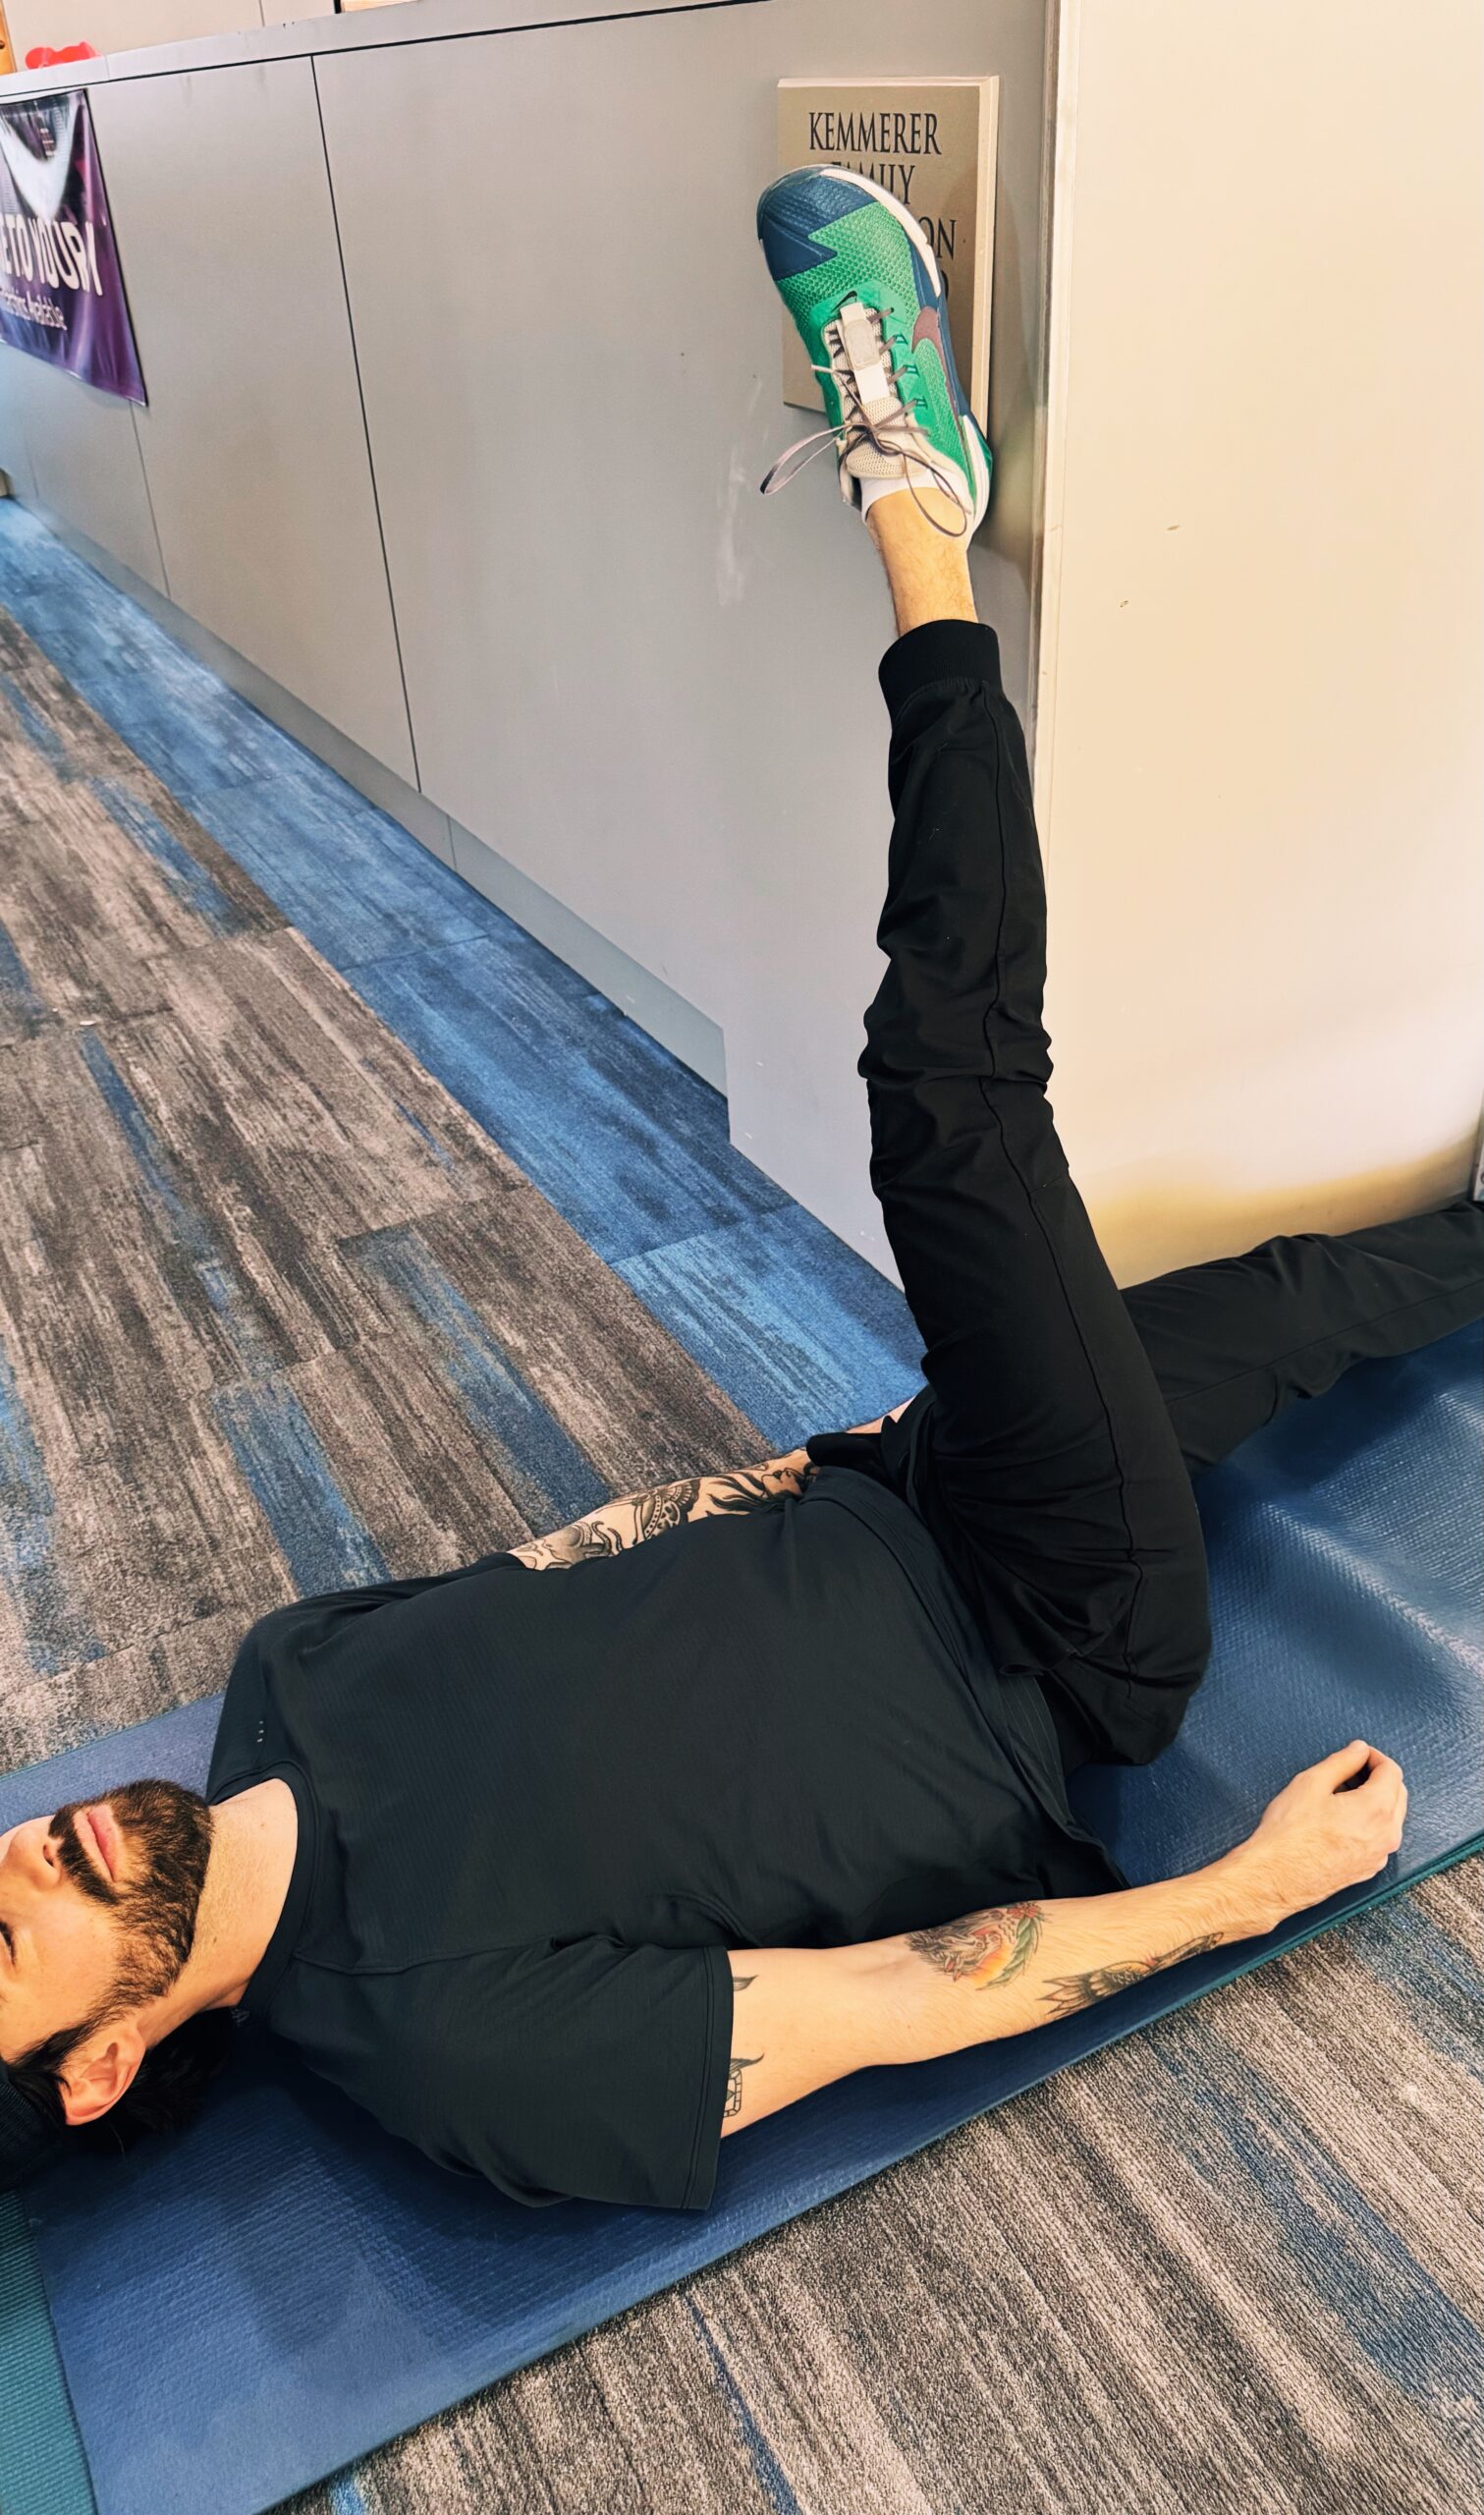
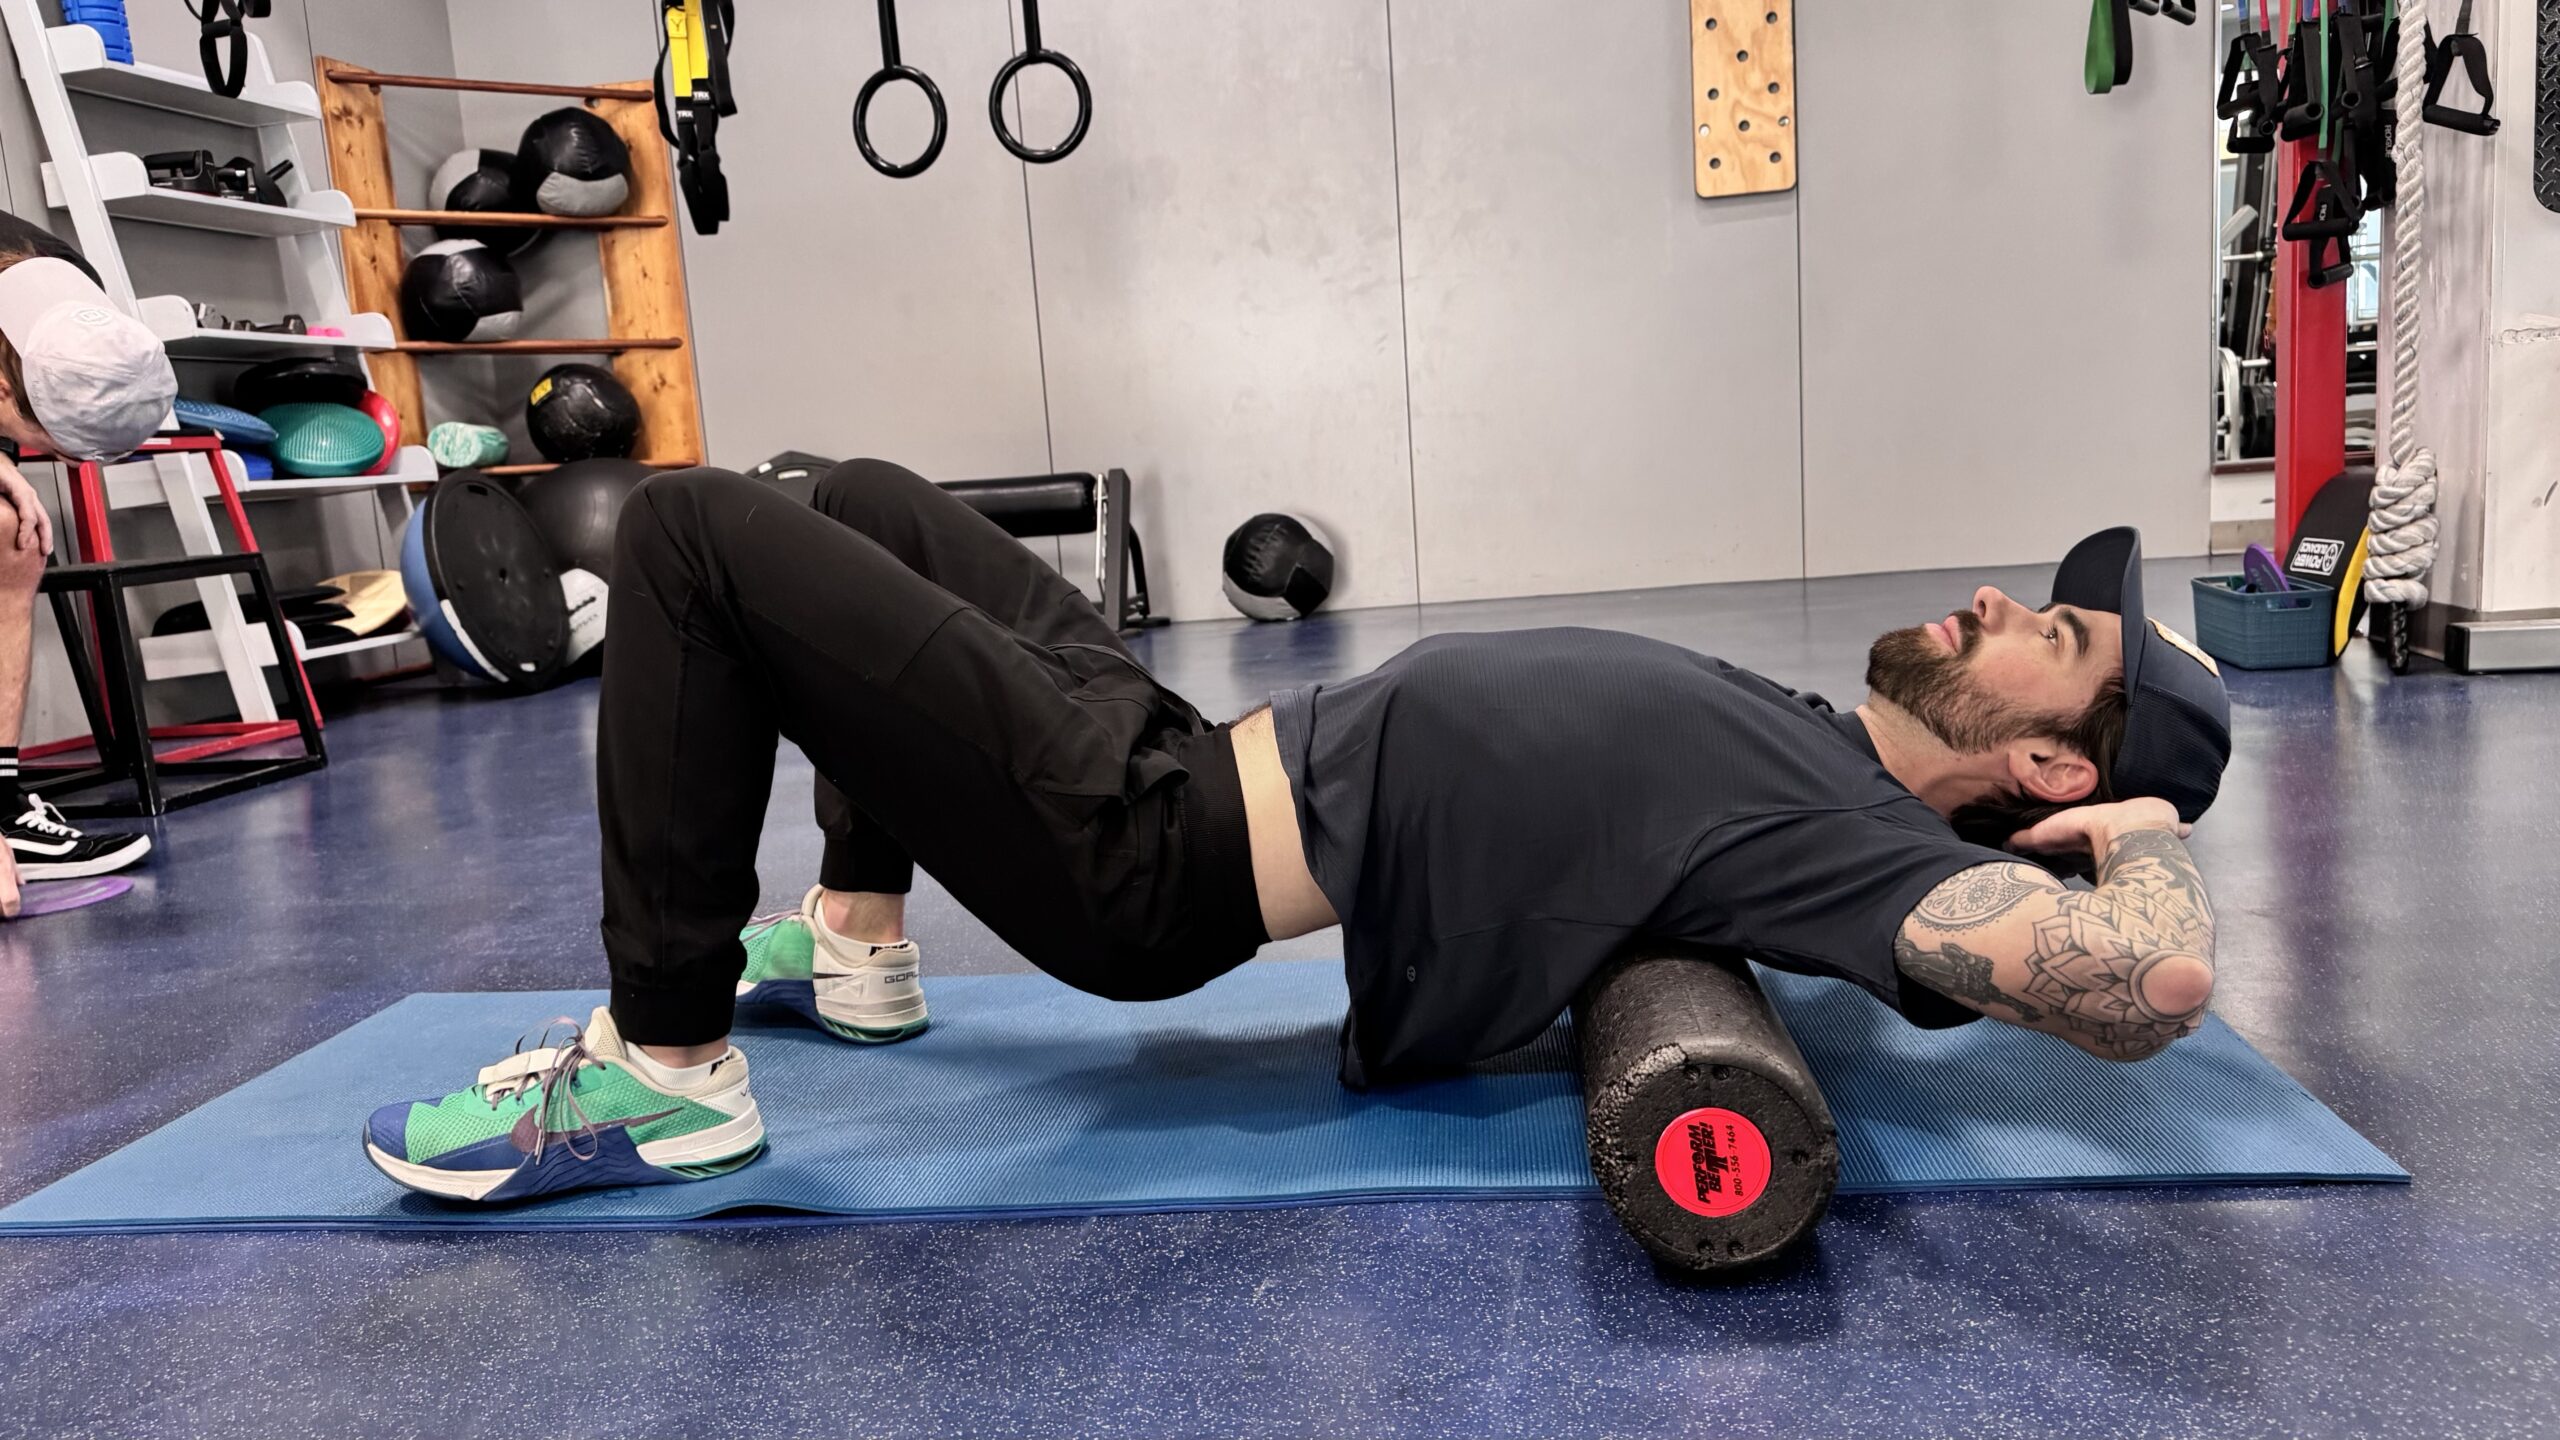
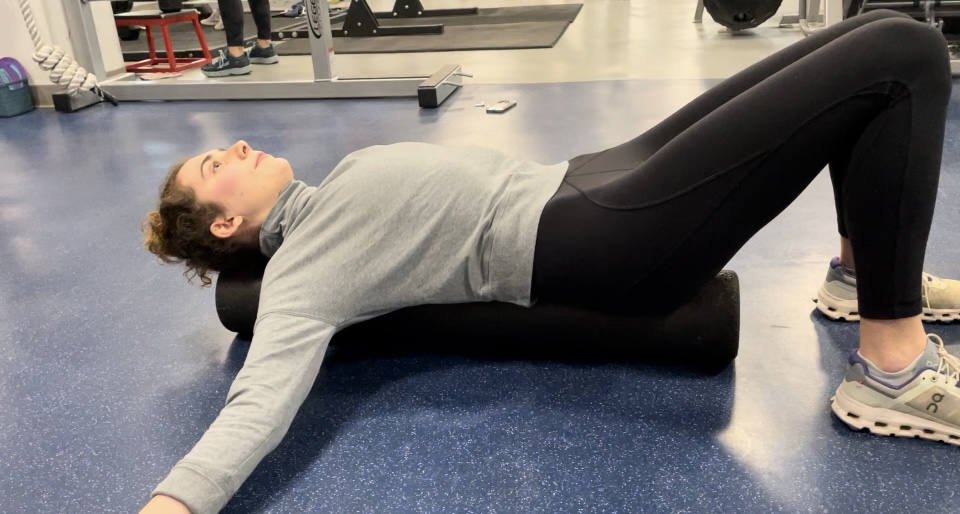
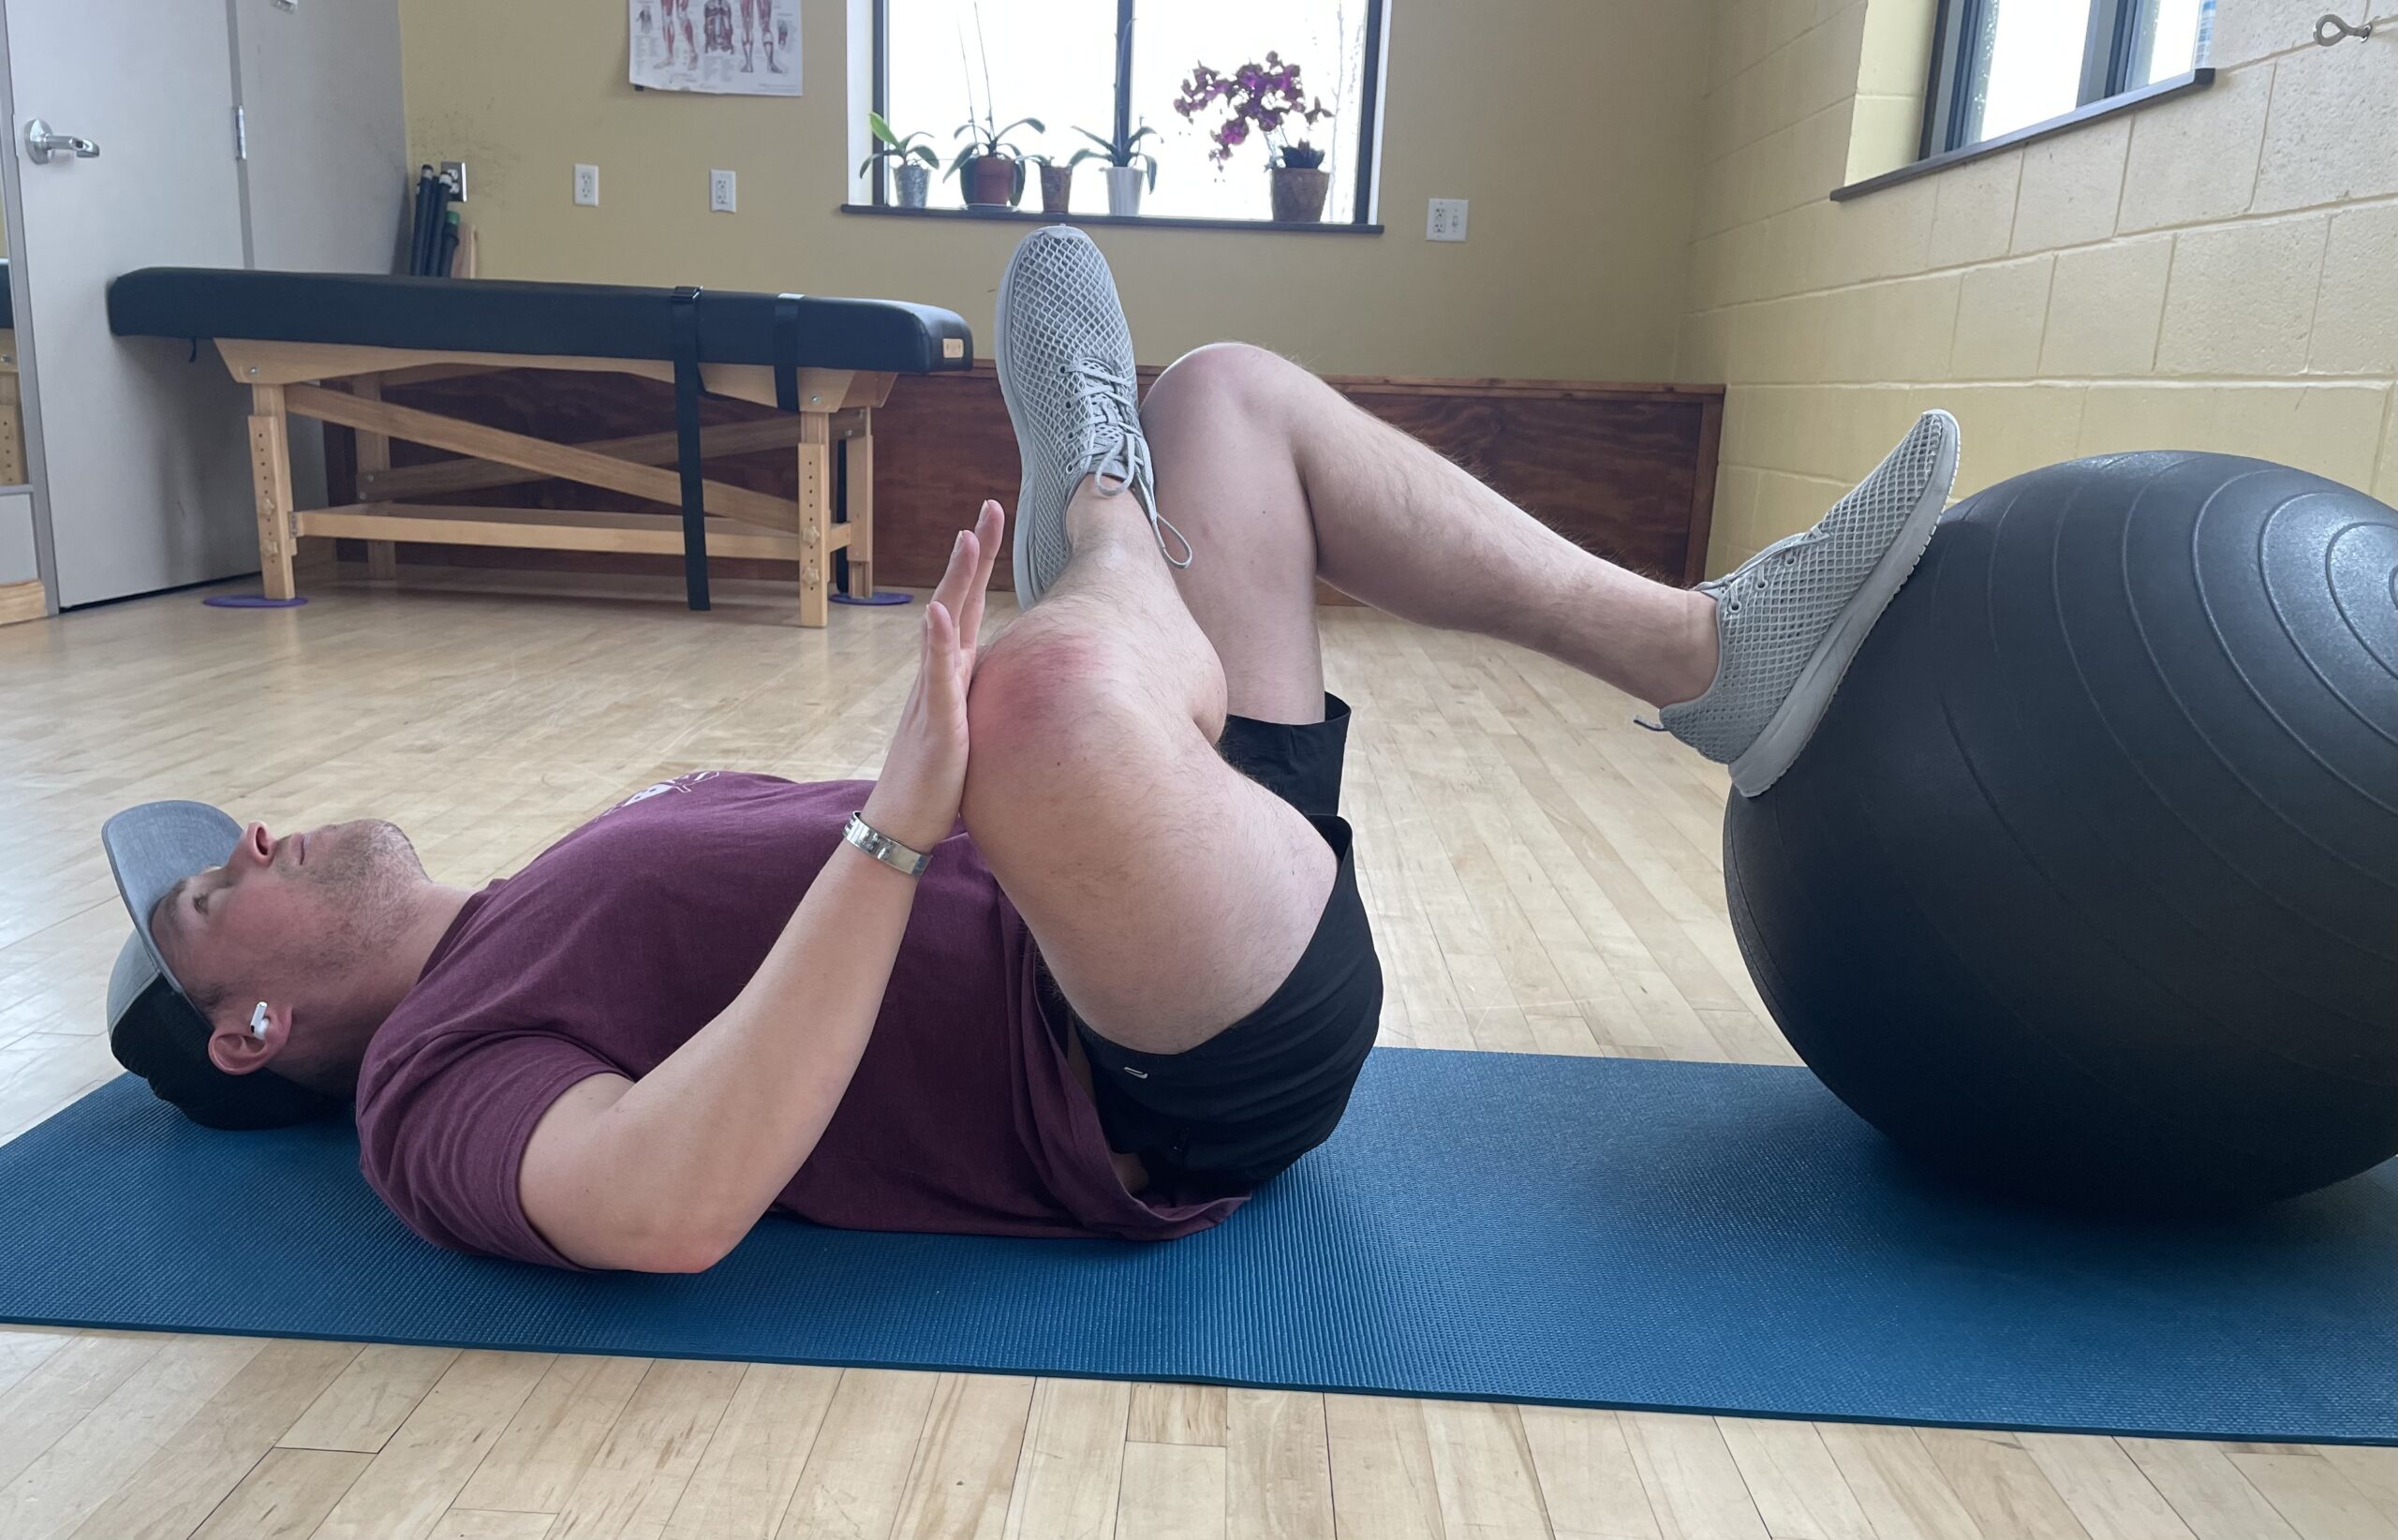
Foam roll the glutes

Tight or shortened glute muscles can limit hip motion and disrupt pelvic alignment, especially for people who sit frequently or tend to overarch the lower back.

Foam rolling the gluteus maximus and piriformis, a deep hip rotator, helps rejuvenate tissue and circulation, allowing the pelvis and hips to move more freely.

  • Lie (or sit) on a foam roller and shift your weight slightly to one side. Place your arm or hands on the floor for support. Roll slowly back and forth over the muscle. Roll for 30 seconds to two minutes per side at least once per day.

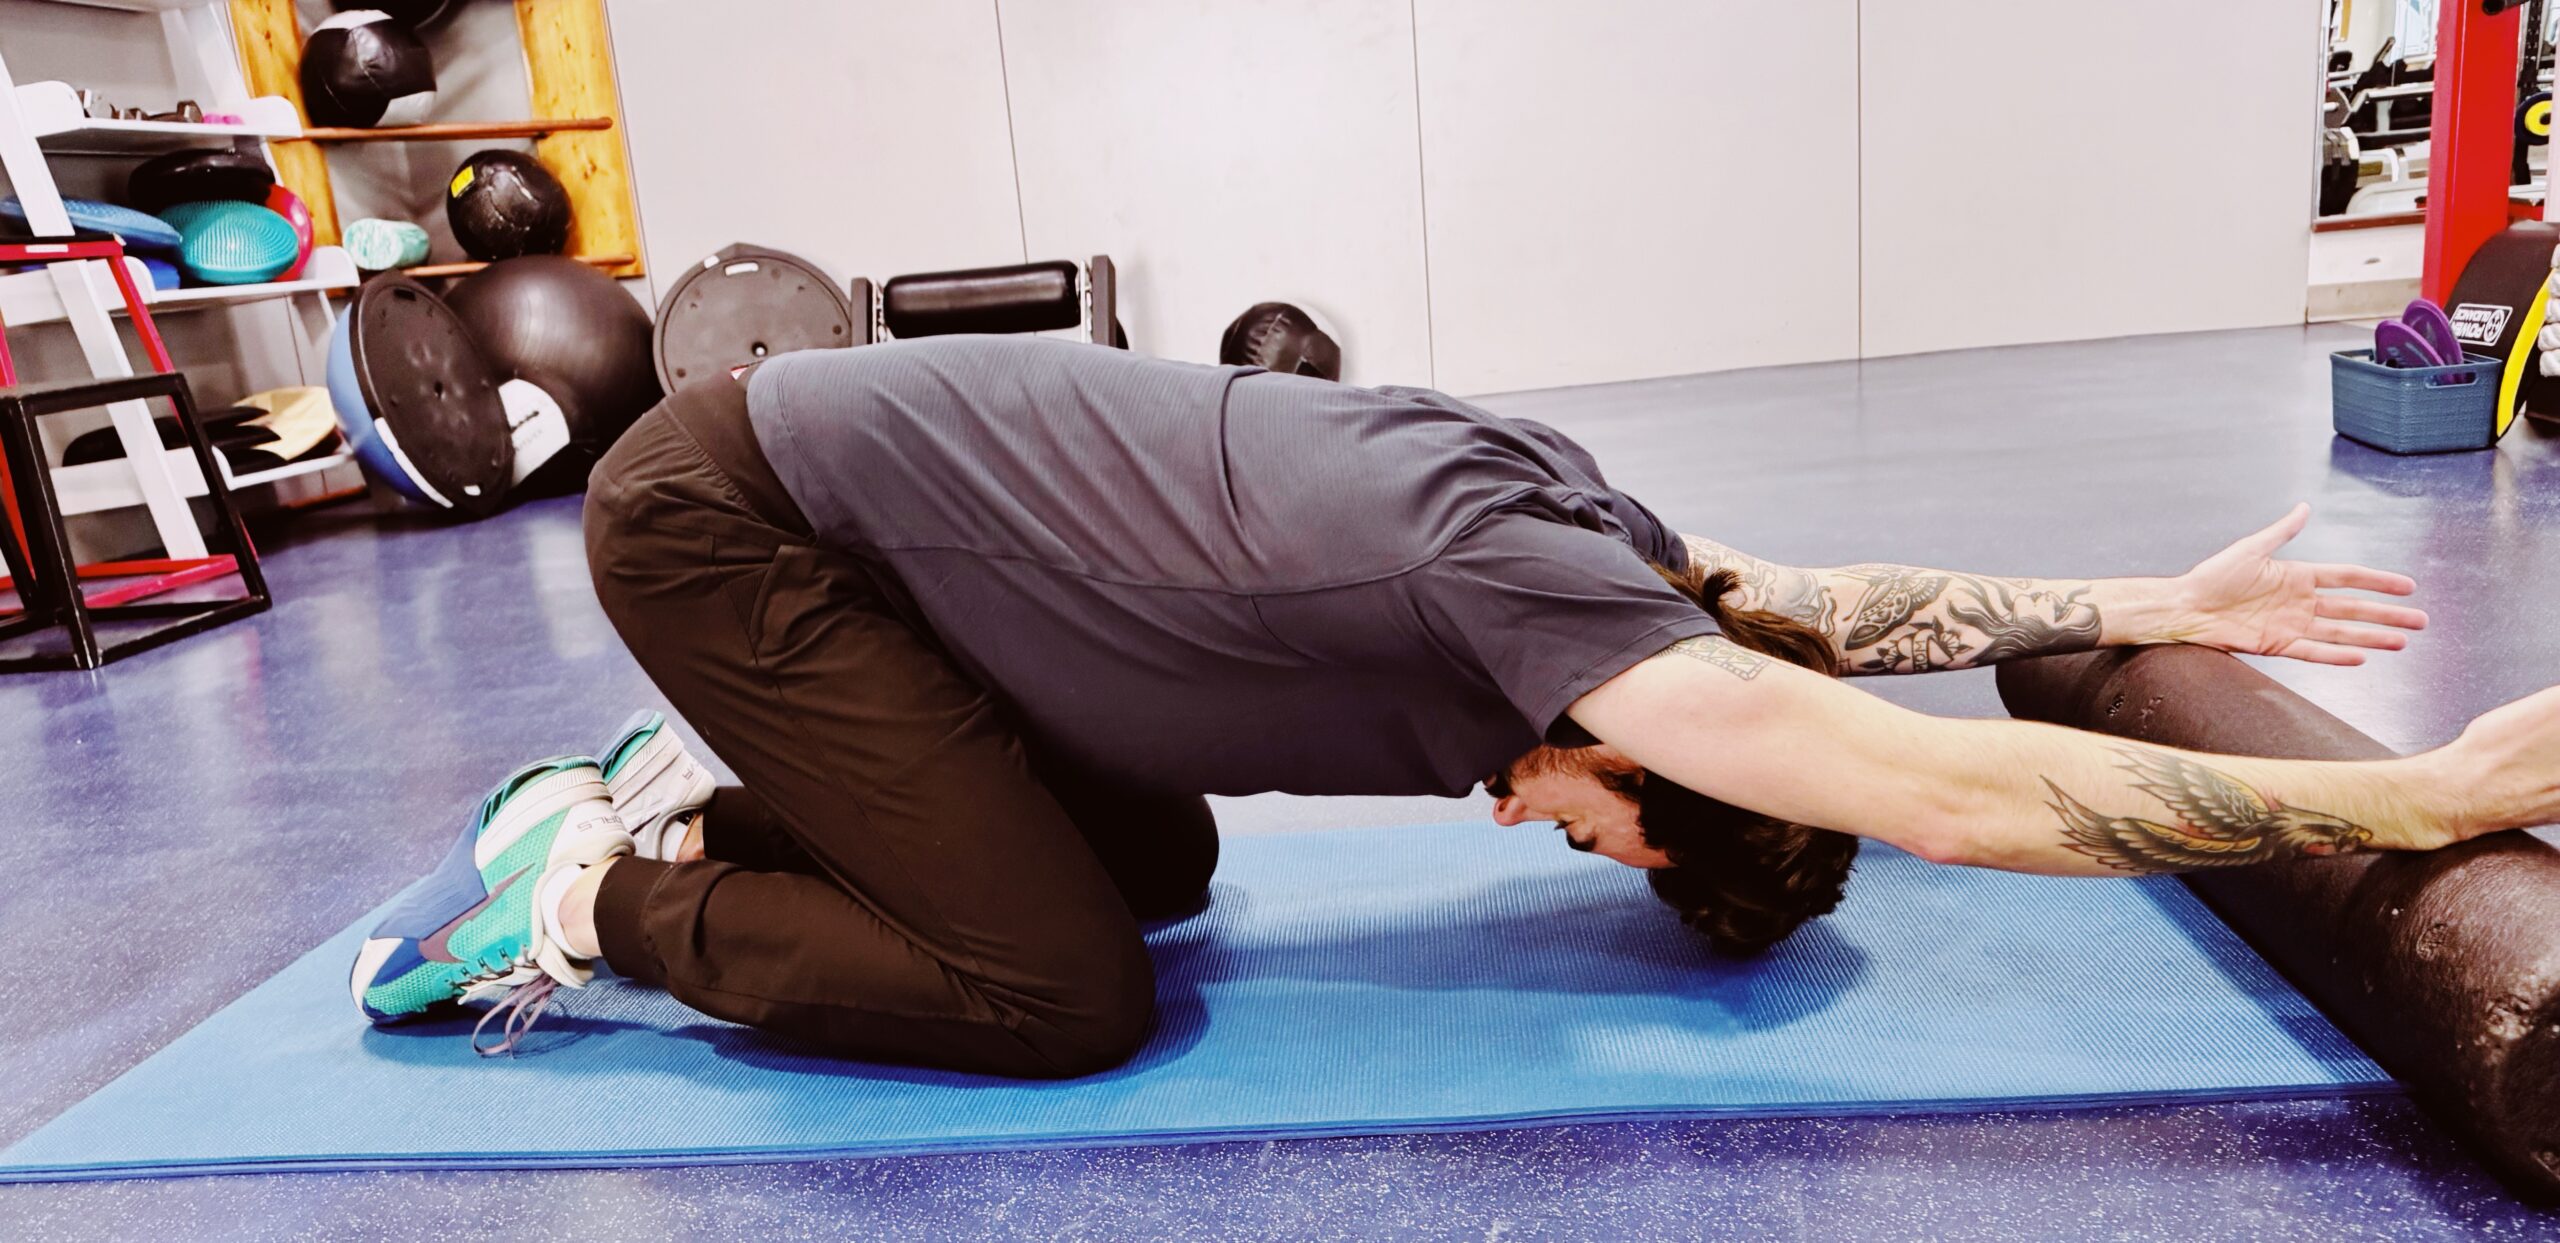
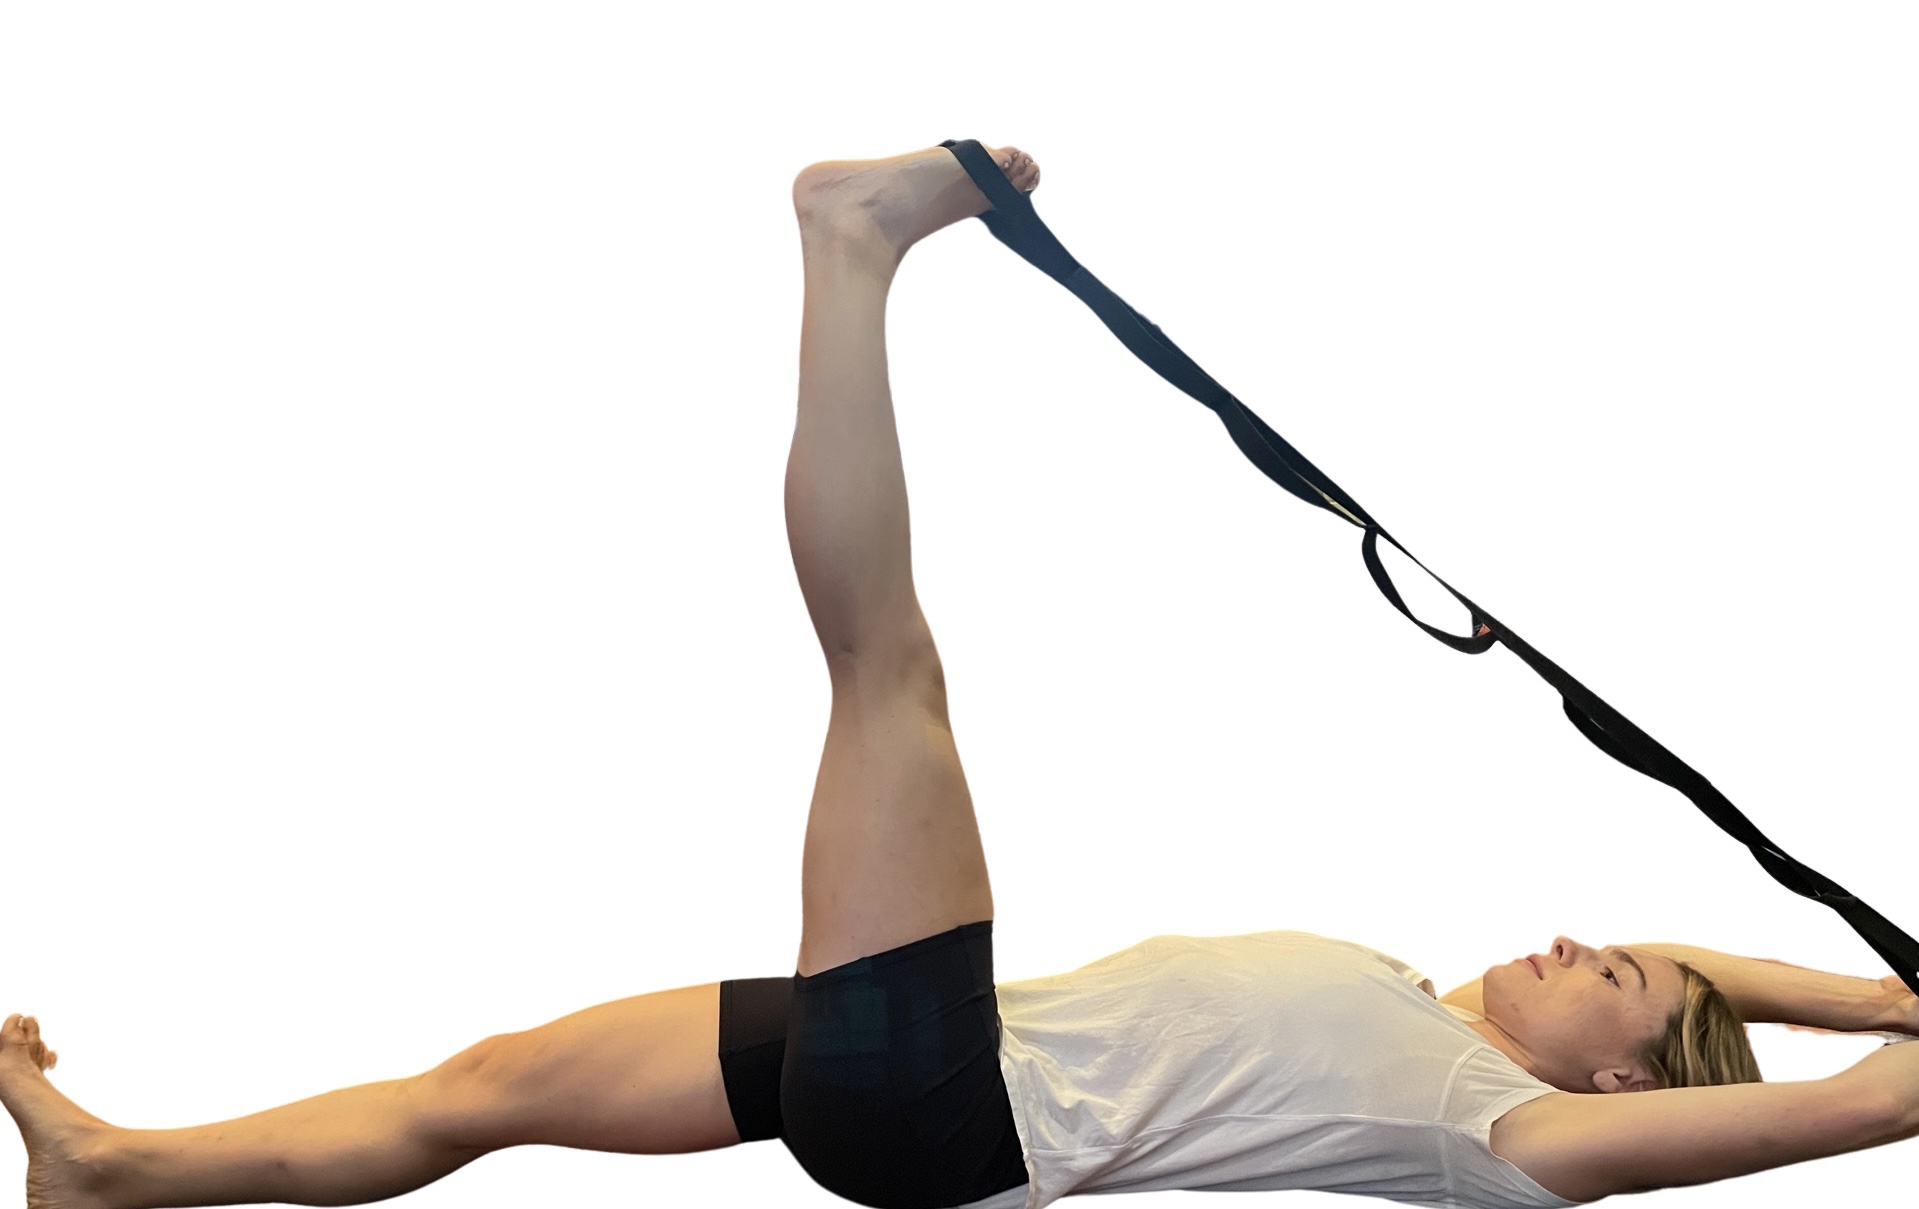
TRX single-leg reaching Romanian deadlift

This upright, supported variation reinforces proper hip hinging while developing balance and control. Pressing into the handles engages the anterior core and encourages proper glute activation. The gluteus medius, a key stabilizer of the pelvis, works alongside deep core muscles to maintain alignment, playing a critical role in efficient movement.

  • Hold the straps, set at mid-length, with arms extended at chest height. Stand on one leg with a slight bend in the knee and hinge forward at the hips while extending the free leg back. Keep the pelvis level and return to standing. Perform eight slow repetitions per side.

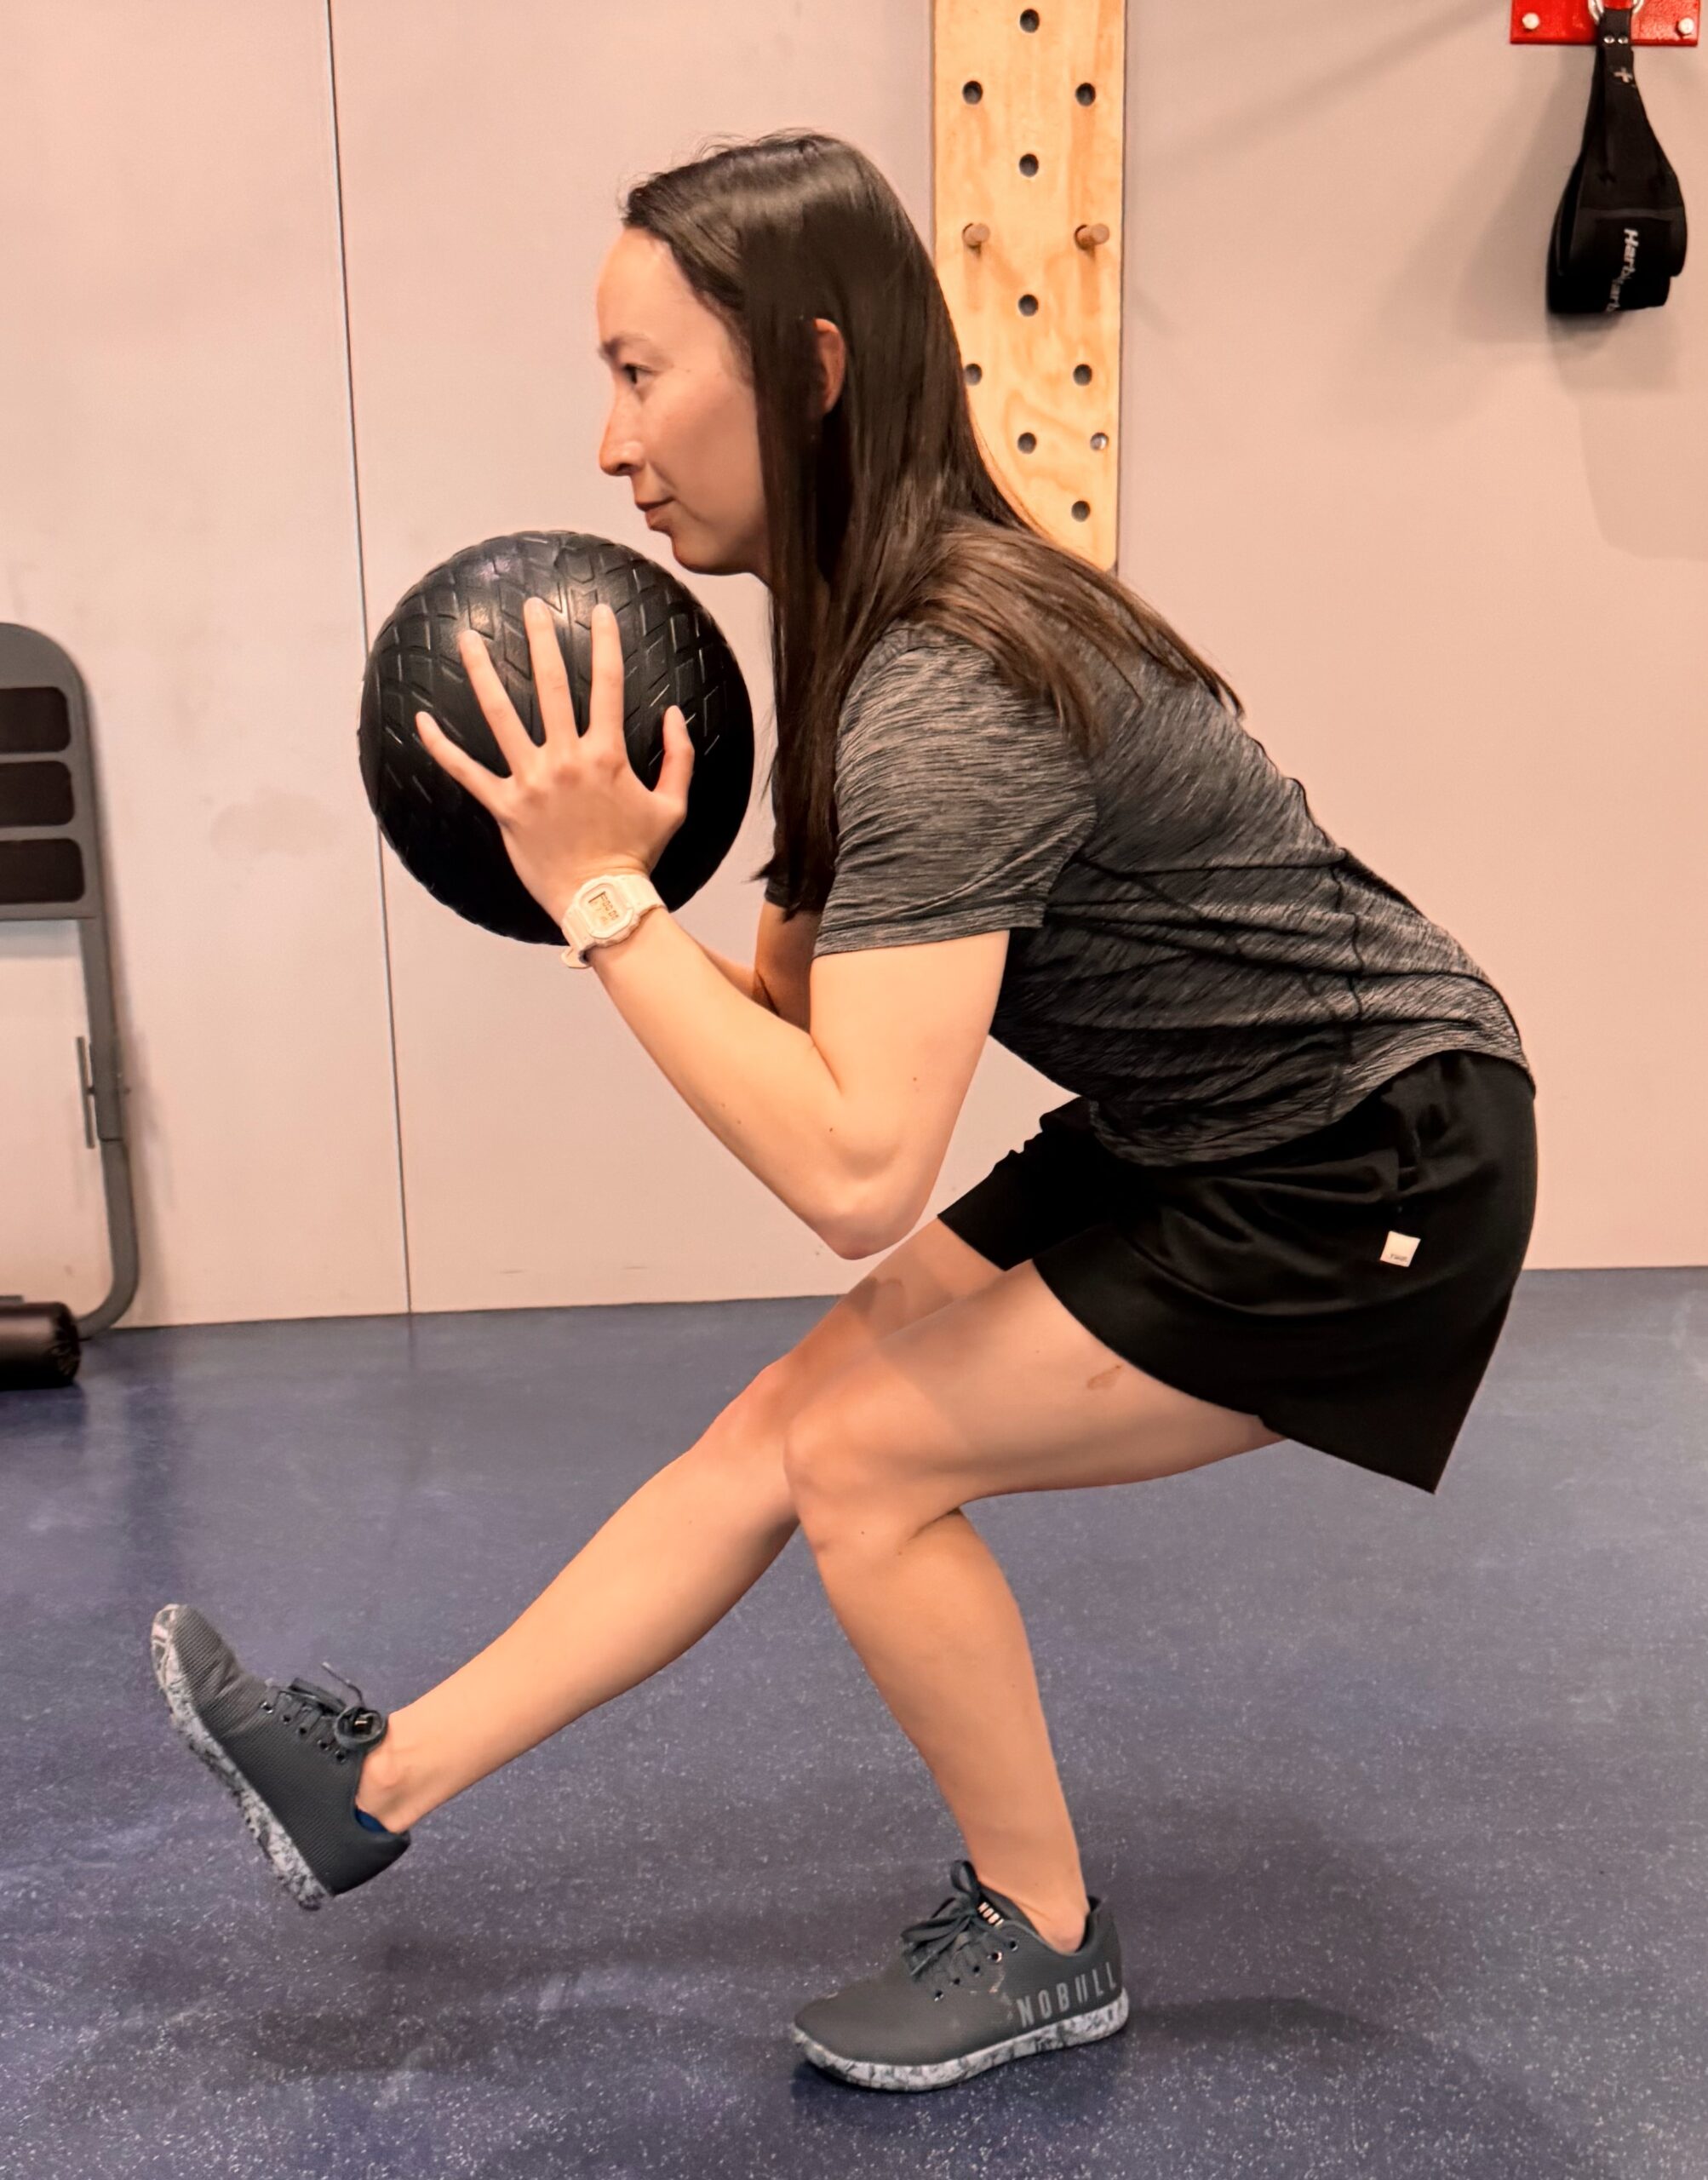
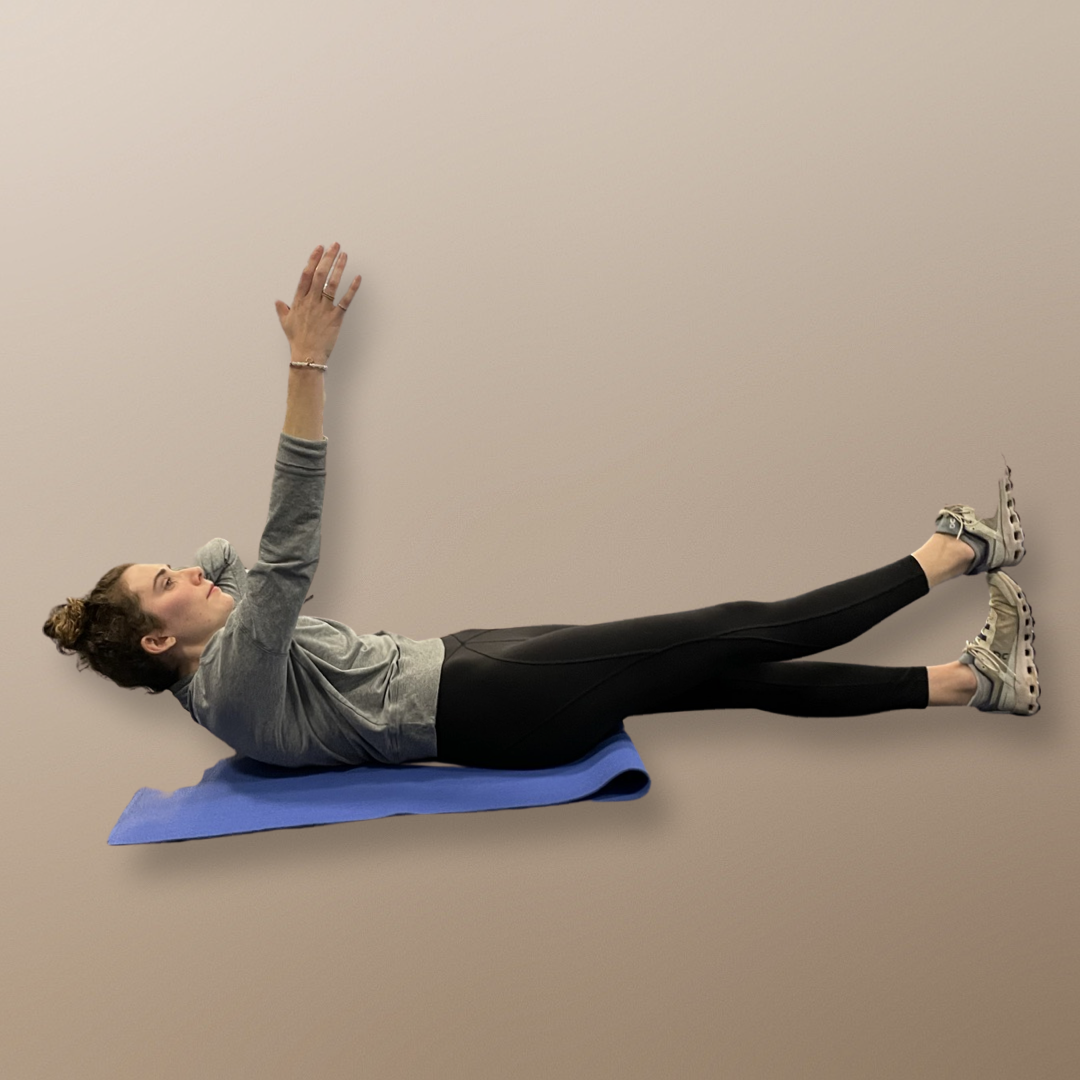
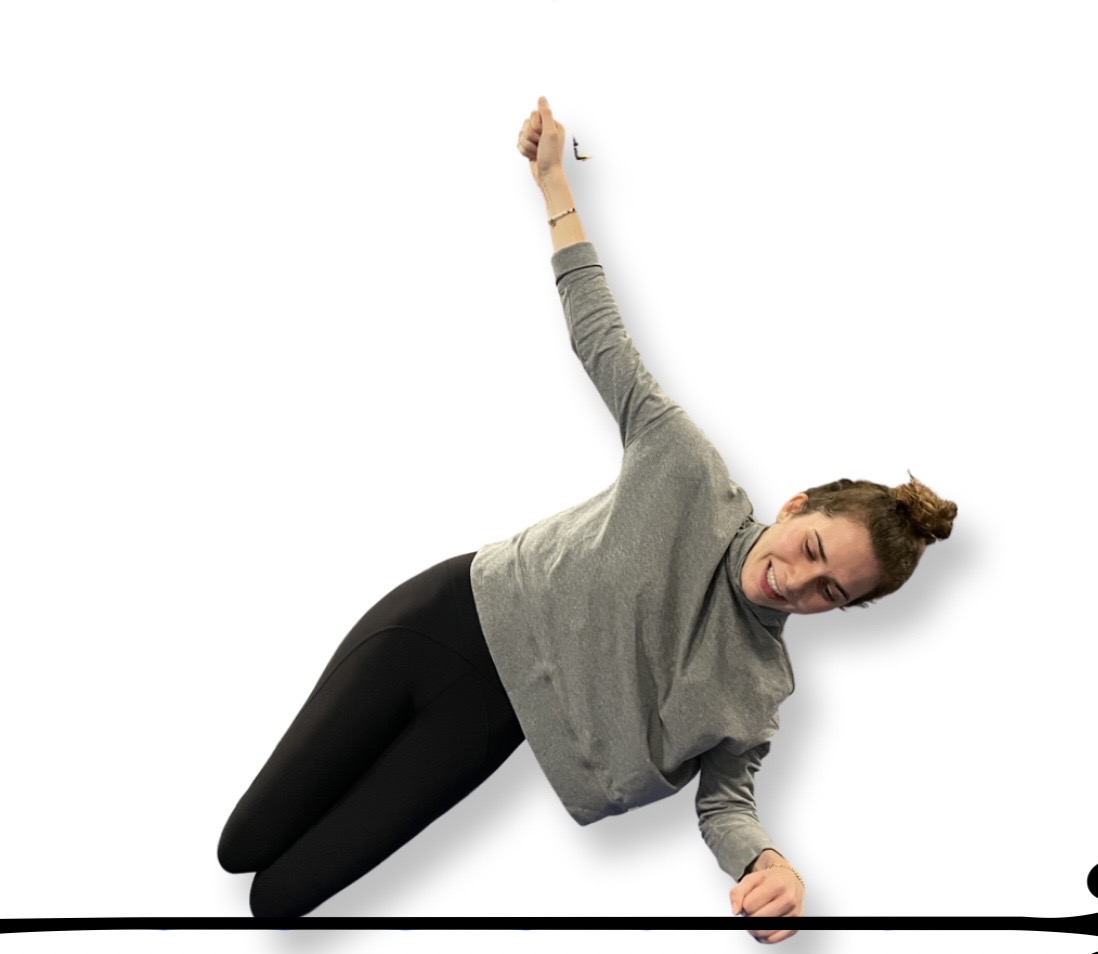
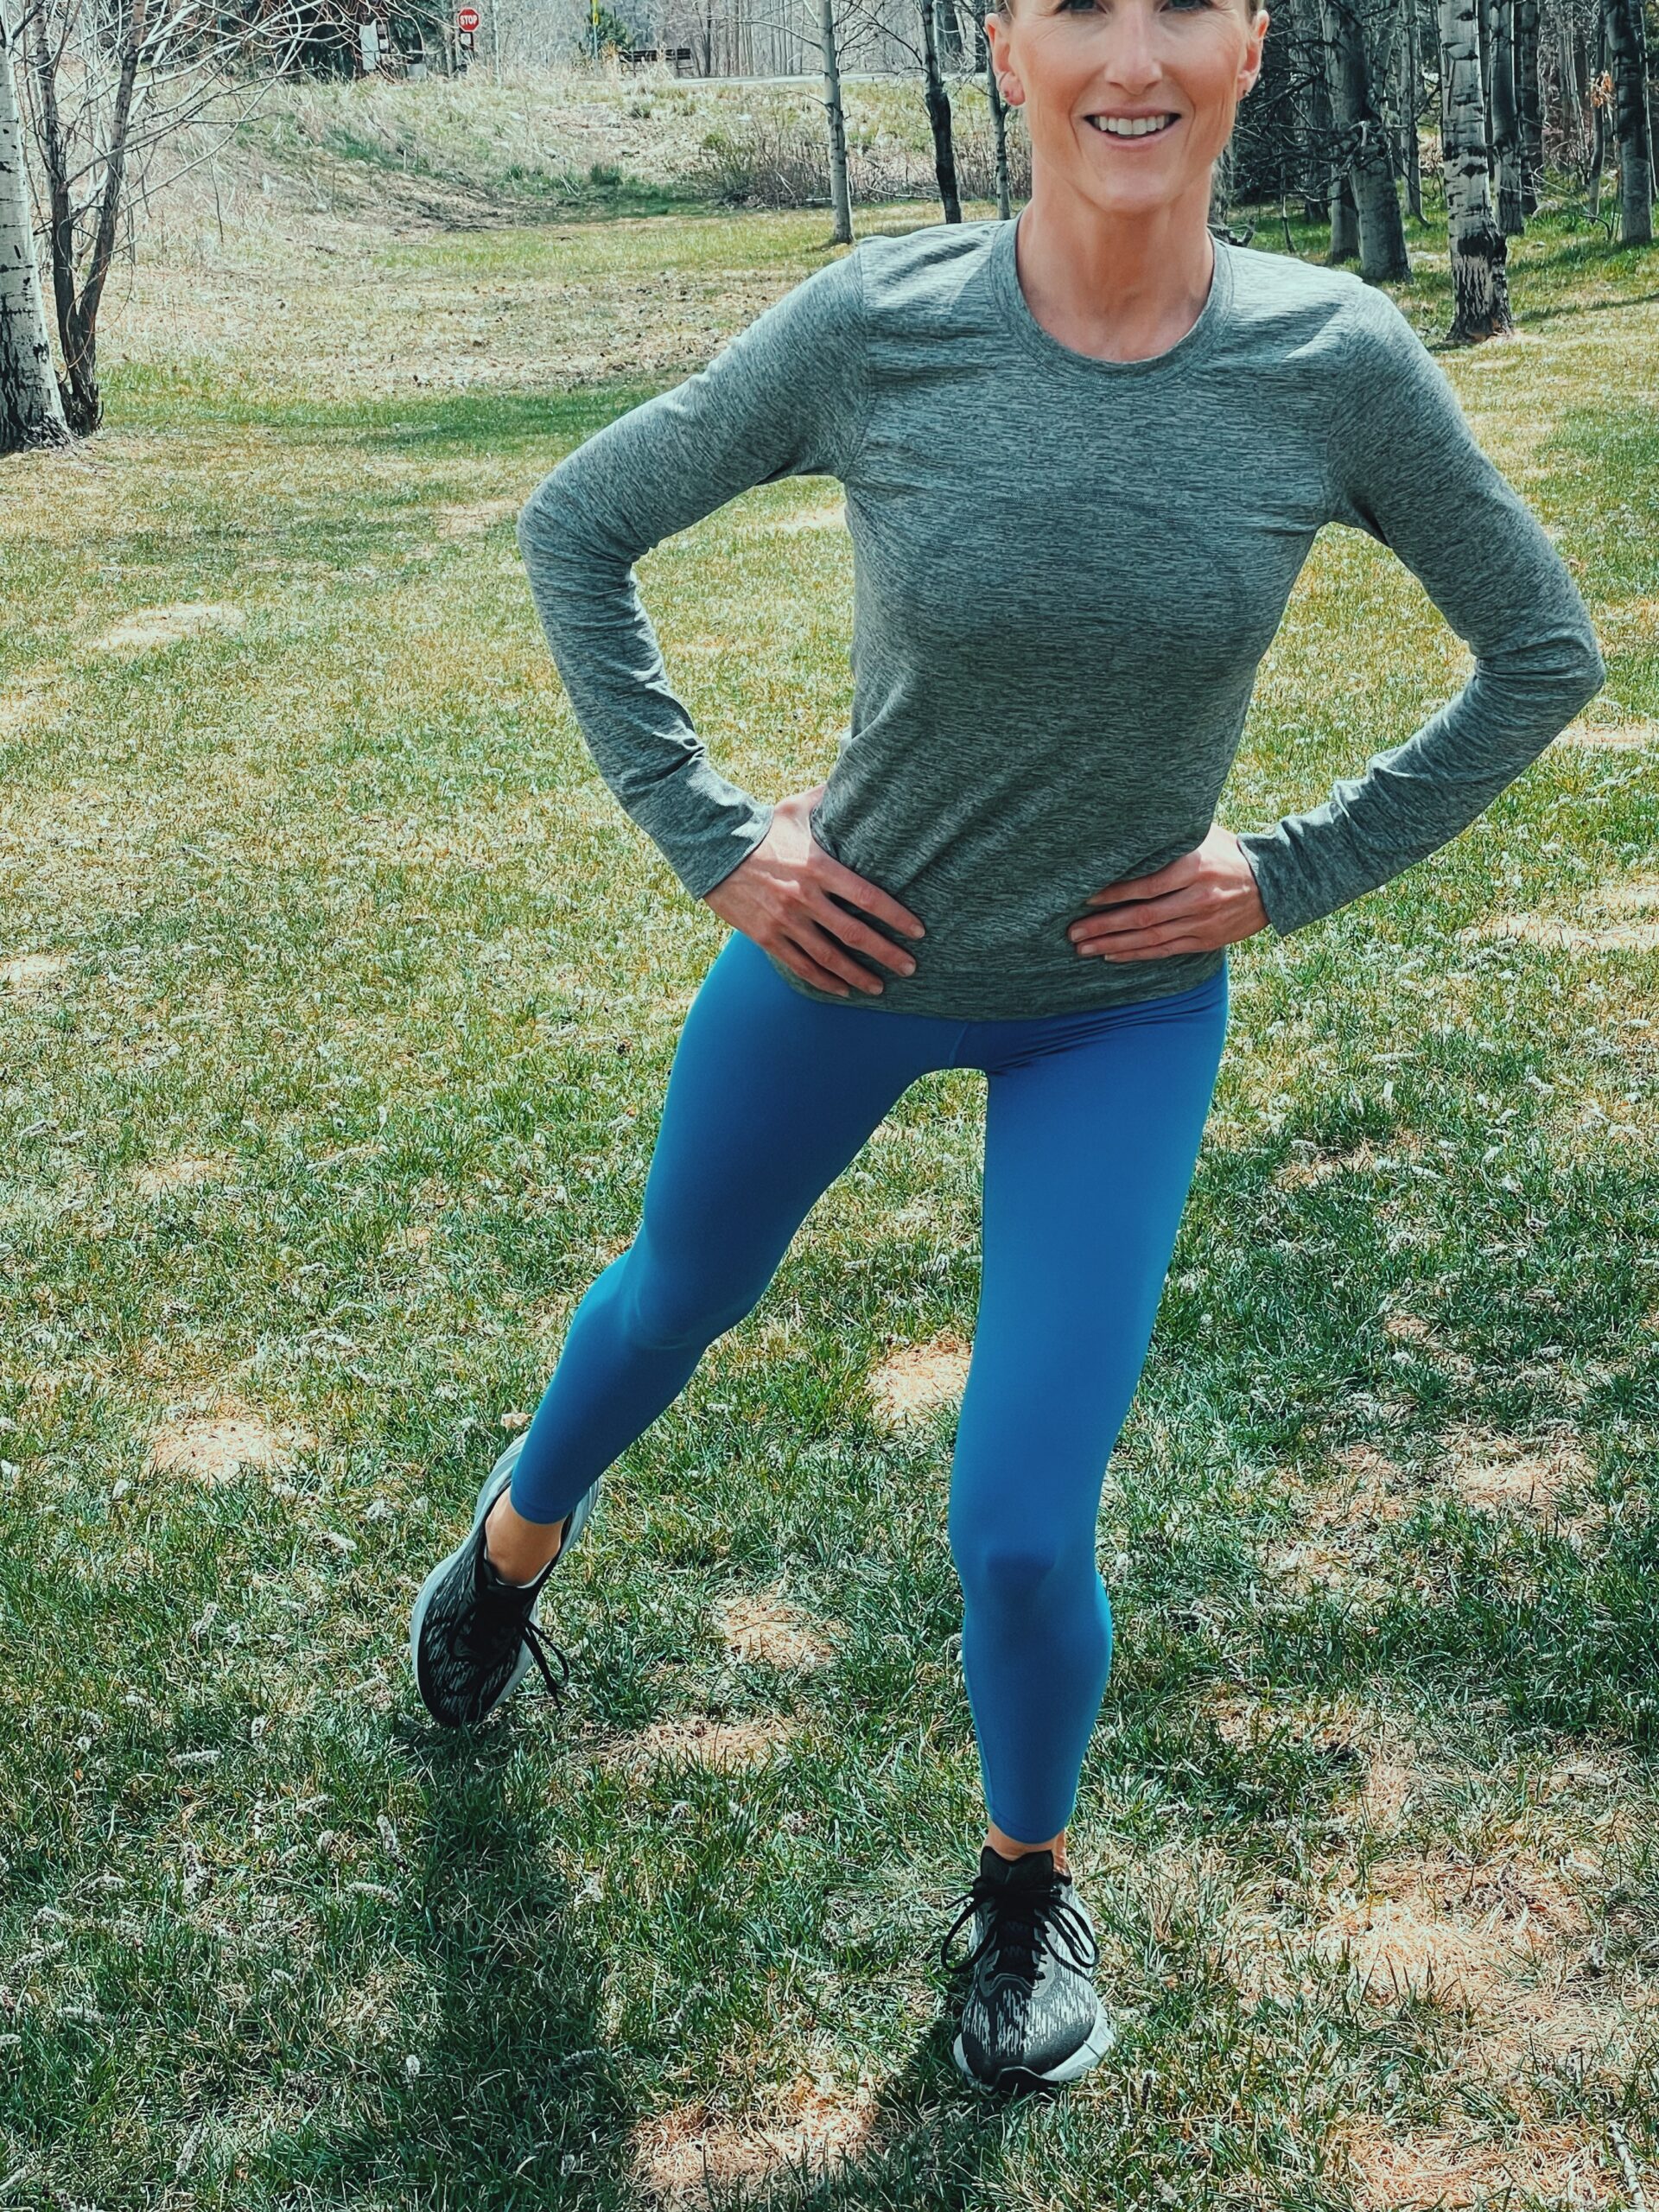
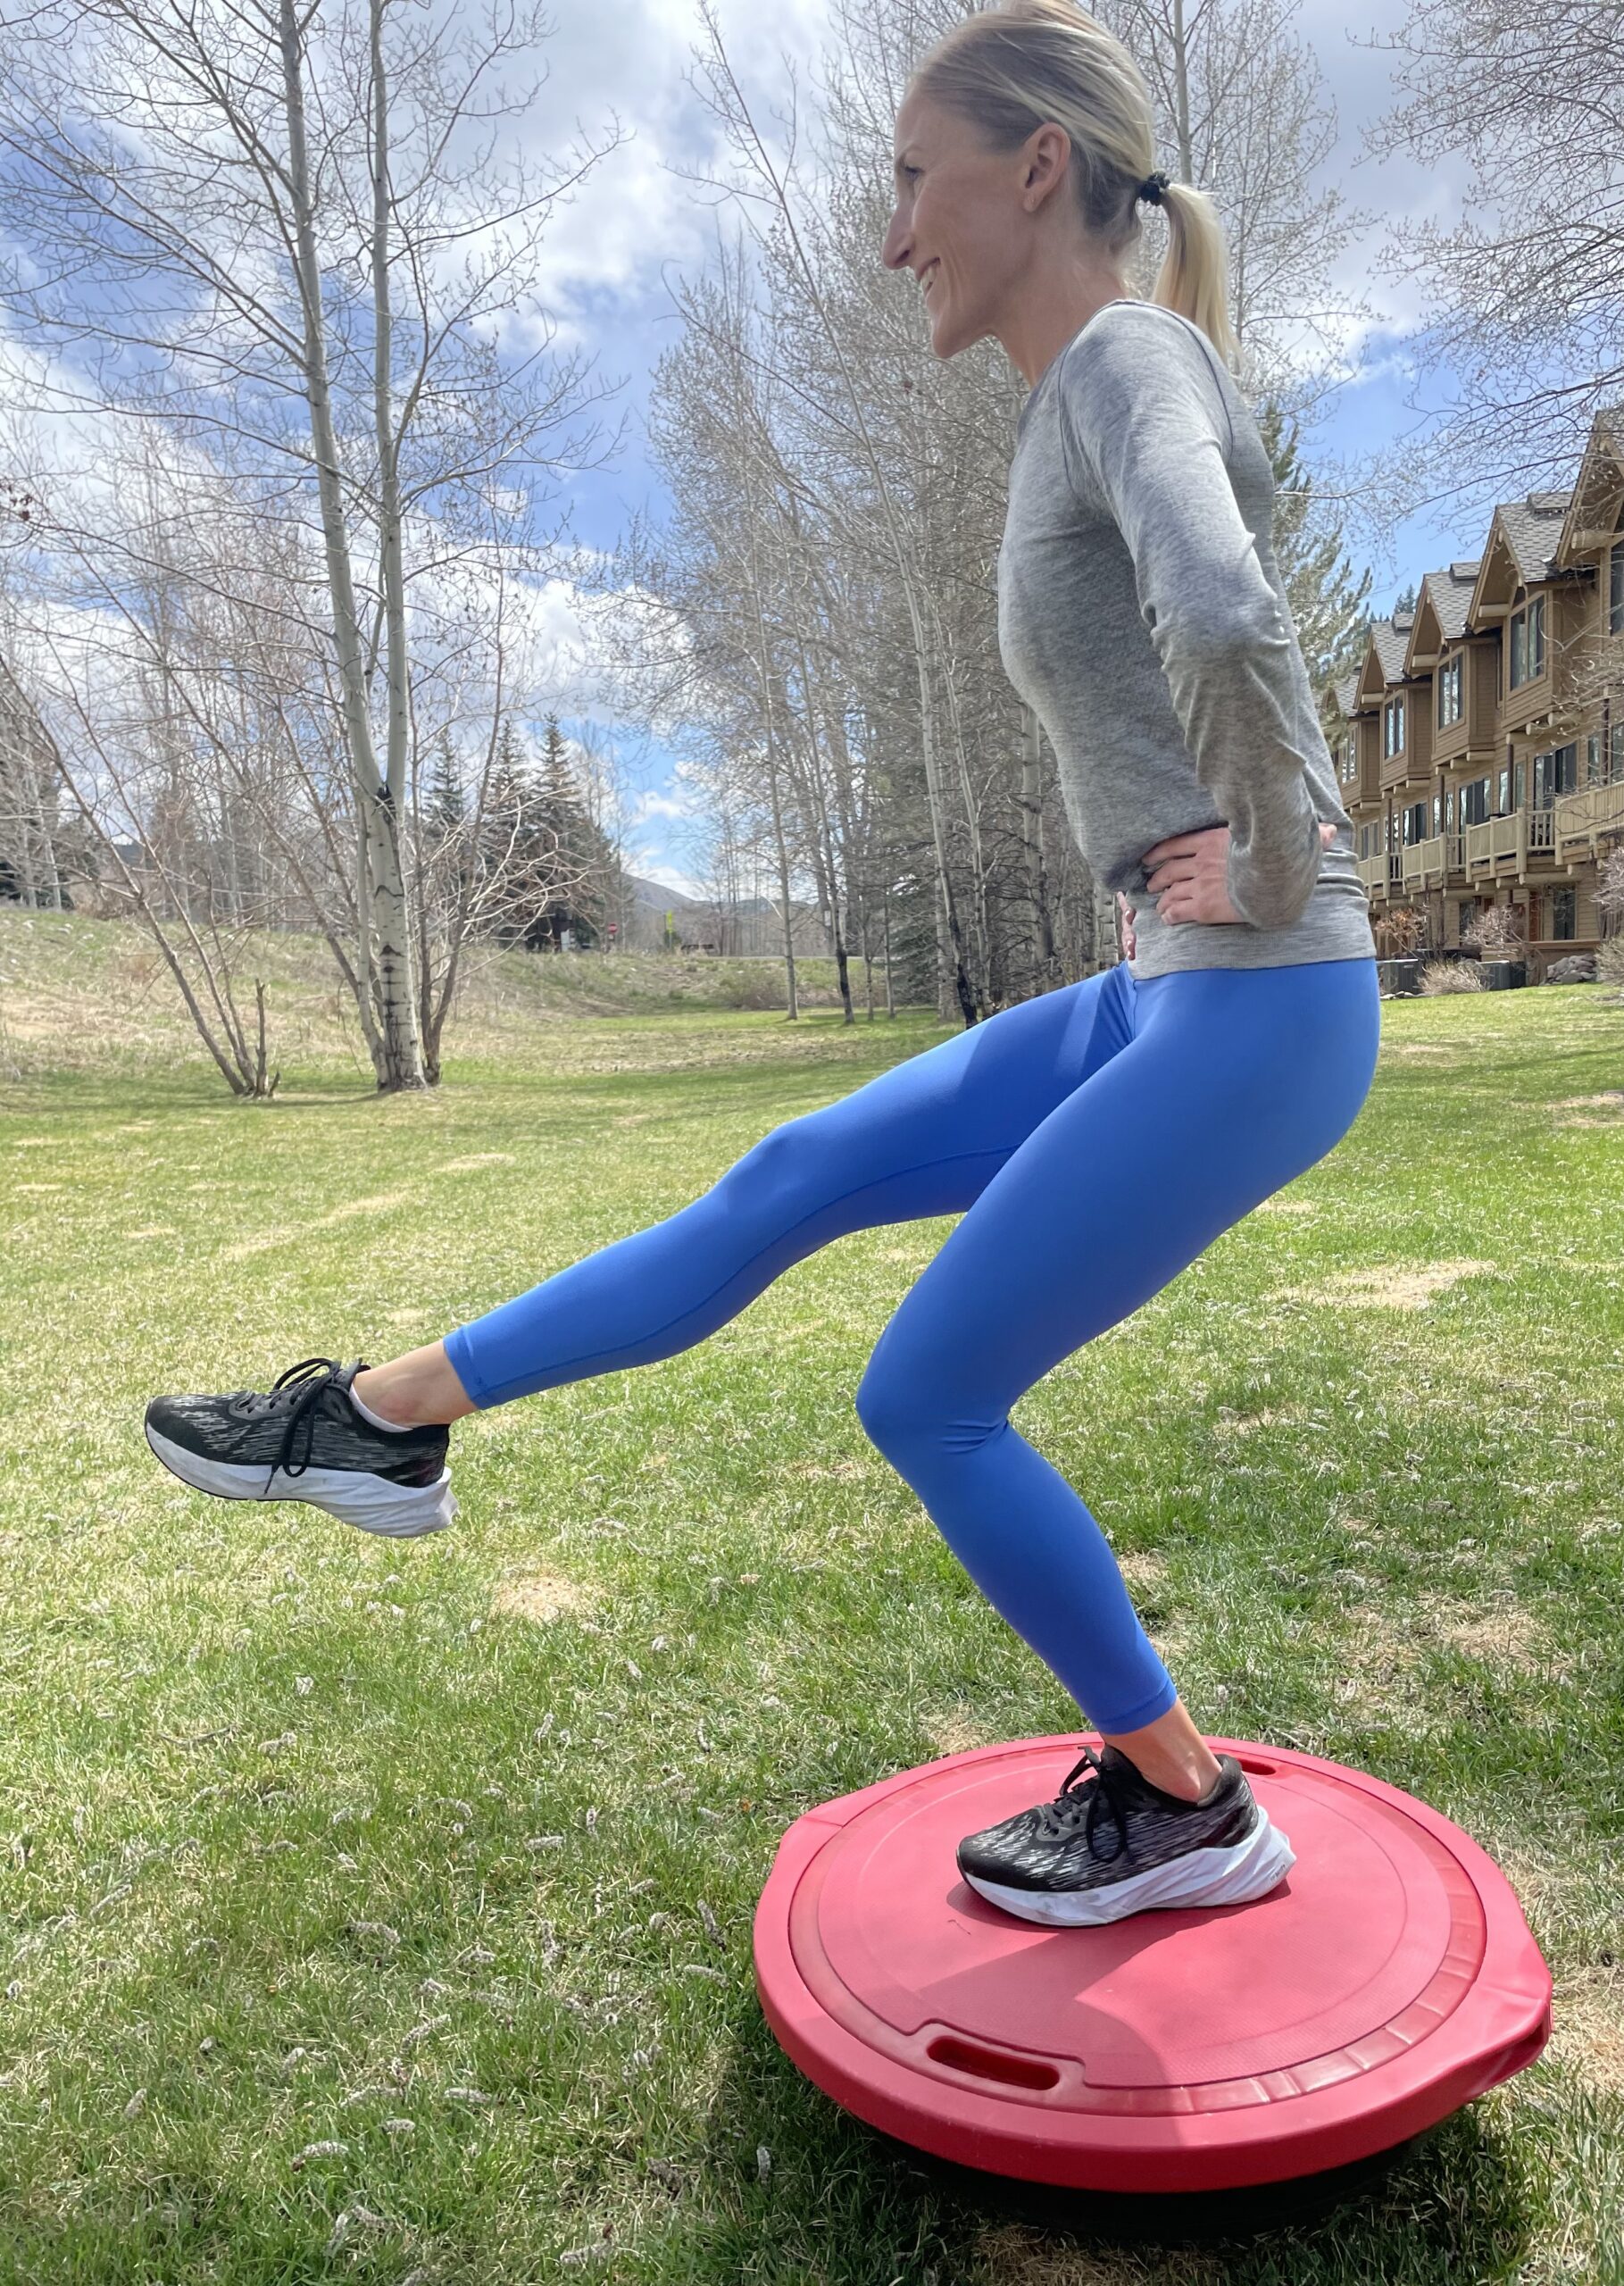
Single-leg Romanian deadlift

Single -leg Romanian deadlift

🔹Flex at hip while maintaining slightly bent kneeo of the targeted leg;
keep straight torso.
🔹Reach the free leg back as the chest moves forward, keeping the movement long and horizontal.
🔹Return to start.
🔹Touch the ground between reps to regain balance.

.

The single-leg Romanian deadlift is one of the most effective exercises for strengthening the glutes. Training one side at a time improves balance and pelvic stability, helping the body move more efficiently and confidently in both daily activities and athletic pursuit.

Published in The Idaho Mountain Express February 13, 2026

https://www.mtexpress.com/wood_river_journal/features/fitness-guru-why-single-leg-strength-matters-more-than-you-think/article_bb49a02e-426e-4053-80ba-9e50cf590a31.html

Fitness Guru: The posture shift that changes everything

-Checking vertical alignment between cheekbone and collarbone.

  • Photos courtesy of Connie Aronson

Example of forward head position-note the misalignment

It’s to your advantage to have your head perched directly above your spine—not just for good alignment, but for how you feel and move throughout the day. A head in optimal alignment with the neck can reduce tension, improve your body image and even change the way you carry yourself.

Try this: Imagine your head as a helium balloon floating gently upward. Your neck and spine are the string, soft and flexible like wool. This simple mental image can instantly relax your shoulders, lengthen your neck and help you stand taller—without effort or strain.

Now, consider the weight of that “balloon.” The human head weighs anywhere from 9 to 12 pounds. When it’s aligned over the spine, your body carries that weight with ease. But for every inch the head shifts forward, the effective load on your neck doubles. That forward head posture—common with screen time and stress—can wreak havoc on your neck, shoulders and overall alignment.

Here’s a quick way to check your head position:

The forward head scan

1. Sit near the edge of a chair.

2. Place one index finger on the part of your cheekbone that sticks out just below the eye.

3. Place your other index finger directly below it on your collarbone.

4. Look in a mirror or ask someone to check: Are the two fingers vertically aligned?

If the finger on your cheekbone is ahead of the one on your collarbone, your head is likely too far forward for optimal alignment.

Awareness is the first step. Use both the visual imagery of the floating balloon and this hands-on check throughout the day to gently guide your head back to center. When your head is naturally balanced at the top of your spine, your whole body follows.

A small shift at the top can create big changes in how you feel, move and carry yourself—no equipment required.

Connie Aronson is an exercise physiologist and Corrective Exercise Specialist ( TBBM-CES ) Visit her and her Golden, Josie on Instagram @Josie_thegolden and www.conniearonson.com

Published in The Idaho Mountain Express October 24, 2025

https://www.mtexpress.com/wood_river_journal/features/fitness-guru-the-posture-shift-that-changes-everything/article_f3cc9071-4dd9-4b09-91fb-2953c180bb88.html

Move better, feel better: the power of myofascial release

Our bodies are built to handle incredible forces thanks to bones, muscles, tendons and fascia working in harmony. But when pain or recurring injuries strike, we often overlook one key player: fascia. This dense, connective tissue weaves throughout the body like an intricate network, influencing how we move and feel.

Ever peeled the skin off a chicken before cooking it? That slippery, white film you see is fascia—it’s the same tissue that wraps around your muscles, organs and bones. In fact, the fascia that lines your bones is what gives structure and support to the entire body.

Justin Price, a leading corrective exercise specialist, compares fascia to a spider’s web: When a fly gets caught in one part of the web, the spider senses the change in tension throughout the entire structure. Similarly, when something’s off in your body, the entire system feels it. A tight calf, for example, might affect not only your ankle but your knee’s alignment and even the way you walk.

When fascia becomes restricted due to injury, repetitive stress or tension, it forms adhesions. These adhesions can limit range of motion and cause compensations in other muscles and joints, explains Price. Learning effective self-myofascial release techniques can help you target these adhesions, rejuvenating the soft tissue and restoring your body’s natural movement patterns.

So how do you keep your fascia healthy and flexible? Self-myofascial release. These simple techniques help relieve tension, break up adhesions and restore mobility—no fancy gear required. A few basic tools, like tennis balls, a baseball, a golf ball or a foam roller can work wonders to release tension in restricted areas. Combined with specific stretches right after rolling, you’ll effectively target tight spots.

Tennis or golf ball foot roll

Tennis or golf ball foot roll

Target: Plantar fascia and lower leg

Tools: Tennis ball, golf ball or any small ball

How to:

  • Place the ball under your foot.
  • Roll back and forth to find tender spots.
  • Pause and apply pressure on sore areas.
  • Roll for 30 seconds to 1 minute per foot.

Pro tip: Keep a ball near your desk or couch as a reminder to roll daily.

Foot and toe wall stretch

Target: Foot and ankle flexibility

Foot and toe wall stretch

How to:

  • Keep the ball of your foot and base of your toes on the floor.
  • Press your toes and knee gently against a wall.
  • Slowly roll your foot and ankle inward toward the wall.
  • Hold for 15-20 seconds.
  • Repeat twice daily.

Target: Psoas and hip flexors

nis ball hip flexor release
Tennis ball hip flexor release

Target: Psoas and hip flexors

How to:

  • Lie face-down.
  • Place the tennis ball just to the side of your belly button.

Gently roll to find tender spots between your belly button and hip.

  • Pause on sore spots for 20-30 seconds.
  • Total time: 2-3 minutes per side

Pro tip: Internally rotate your leg to deepen the stretch.

Follow with a hip flexor stretch

Target: Hip flexors

Kneeling hip flexor stretch

How to:

  • Kneel down, with one foot forward. Pad your knee if needed.
  • Keep your hips tucked in and under.
  • Tighten the glutes and abs isometrically during the stretch.
  • Gently change arm angles to further target hip flexors.
  • Hold for 15-20 seconds, 2-3 cycles.

Taking just a few minutes a day to release and stretch tight fascia can dramatically improve your mobility, reduce pain and even boost performance. Small, consistent actions lead to big changes—so grab a tennis ball and start rolling your way to better movement. 

Published in the Idaho Mountain Express September 26, 2025 https://www.mtexpress.com/wood_river_journal/features/fitness-guru-move-better-feel-better/article_0b114c31-3afd-47c9-bacc-1f9ec9ec9b6f.html

Why you need anti-rotational moves

2.jpg

Medicine ball chop slam.

  • Courtesy photo by Connie Aronson

4.jpg

Half-kneeling medicine ball chop.

  • Courtesy photo by Connie Aronson

Most sports involve some type of rotational movement. Golf, tennis, baseball, skiing and hockey all involve rotation.

Up to 84% of athletes have experienced a low back injury during their sport. In training, it is key to increase stability of the spine. Developing high levels of rotary torque is not a task for your lumbar spine and abdominal muscles; movement should be through the hip and shoulder joints. For athletic performance, learning to transfer high levels of rotary torque from the lower body to the upper body is the task of the trunk muscles.

Anti-rotational exercises can enhance your core stability and overall functional strength. In tennis, for example, the wrist, elbows, shoulder, hip, knee, ankle and toes all exhibit a rotational aspect during a simple forehand stroke. However, a limiting factor in creating more acceleration is the inability to control, or decelerate, the rotational action.

Even everyday movements, such as lifting and carrying, benefit from anti-rotational exercises, as they train the core to function as a unified system. This core stability is essential for maintaining proper posture and alignment in life and athletic endeavors.

Medicine ball chop slam

Tip: For both of the following exercises, choose a medicine ball light enough to be thrown hard but heavy enough to provide resistance. (Test a toss beforehand!)

  • Stand upright with your feet parallel and spread slightly wider than shoulder width.
  • Hold the medicine ball by your midsection away from the wall, with both hands.
  • Tighten your glutes; brace your abdominals.
  • Throughout the exercise, maintain a straight line in your body and don’t rotate your torso.
  • Perform a set of slams; repeat on the opposite side.

Half-kneeling medicine ball chop

  • Kneel on a foam pad or gym mat perpendicular to a wall.
  • Tighten your glutes and brace your core. Throughout the exercise, maintain a straight line through your body.
  • Hold the medicine ball with both hands, away from the wall, at hip height.
  • Slam the ball for a set number of repetitions; repeat on the opposite side.

Connie Aronson is an ACSM exercise physiologist and corrective exercise specialist (TBBM-CES). Visit her and her golden retriever, Josie, on Instagram @conniearon.

Supercharge your core- The bird-dog meets the pilates reformer, no springs attached

Core training isn’t just about strength, it’s about teaching your body how to move efficiently. The bird-dog is a standout exercise that builds spinal stability, reinforces good posture and enhances coordination, all without placing excessive load on the spine.

Often called the quadruped opposite arm and leg raise, it’s widely used by strength coaches and rehab professionals.

What sets it apart is that it helps stabilize the trunk. By lifting the opposite arm and leg while maintaining a neutral spine, the bird-dog recruits deep stabilizers like the multifidus, longissimus and iliocostalis while also activating the hip extensors and the gluteus maximus and minimus.

More than a basic exercise, the bird-dog is an excellent core move, teaching you the ability to move the hips and shoulders independently while maintaining a stable, neutral spine.

Now move this exercise to a pilates reformer machine—with no springs.

Removing the springs adds an element of instability, requiring your core and spine stabilizers to work harder to maintain control. The moving platform challenges your ability to maintain alignment under shifting conditions. Every lift and reach of the arm and opposite leg demands locking the spine on the pelvis and fully extending the hip. Your core has to work harder to maintain balance and alignment, turning this into a highly effective core exercise.

By eliminating assistance from the springs, you shift the demand entirely to stabilizing muscles.

This variation is challenging, innovative and engaging—a core endurance exercise you need to try!

Published July 4, 2025 https://www.mtexpress.com/wood_river_journal/features/fitness-guru-supercharge-your-core/article_96b7ed7d-4f87-4b74-9649-27cc20d0474a.html

Target your glutes like a pro

Featured

The gluteal muscles are large, powerful muscles that cross the hip joint and play a critical role in nearly all lower-body movement. The gluteus maximus is the largest of these muscles and is responsible for extending and laterally rotating the hip joint, enabling movements like standing up, climbing and running.

The gluteus medius and gluteus minimus sit on the side and back of the hips and function primarily as hip abductors. These muscles are essential for stabilizing the pelvis, particularly during single-leg activities such as walking or running.

Gluteal strength is crucial for efficient movement, especially in the gait cycle. Strong glutes help carry the weight of the leg during swing phases and contribute to balance and propulsion. Increasing gluteal strength can lead to:

  • Improved running speed
  • Reduced knee pain
  • Decreased risk of hip osteoarthritis
  • Enhanced pelvic stability during movement

Weak gluteal muscles can lead to improper alignment, such as the knee collapsing inward (valgus), which places undue stress on the joint and increases injury risk.

A practical example of glute strength in action is something as routine as getting out of a car. In this movement, the gluteus maximus works to stabilize the knee and extend the hips, helping you rise from a seated position smoothly and safely.

When selecting the most effective exercises to target the gluteal muscles, it’s important to choose movements that provide sufficient stimulus and mechanical tension. These are key factors in promoting muscle strength and hypertrophy.

A study published in Medicine & Science in Sports & Exercise evaluated eight commonly used hip-focused exercises aimed at strengthening the glutes, whether for injury prevention or rehabilitation purposes. The researchers examined several variables related to muscle function, including:

  • Muscle force
  • Fiber length
  • Fiber velocity
  • Muscle activation

By analyzing these elements, the study was able to rank the exercises based on how effectively they engaged the gluteal muscles. This type of research helps inform smarter exercise selection—ensuring you’re not just working hard, but working effectively.

The exercises were single-leg squat, split squat, single-leg Romanian deadlift, single-leg hip thrust, banded side step, hip hike, side plank and side-lying leg raise. A 12-repetition intensity was selected as it is based on a typical training range used in rehab and injury prevention programs.

Research shows that the split squat, single-leg Romanian deadlift (RDL) and single-leg hip thrust produce the highest gluteal muscle forces, making them top-tier choices for overall glute development.

When it comes to targeting the gluteus medius and minimus—key muscles for hip stability—the side plank and single-leg RDL come out on top.

As expected, weighted variations of these exercises are significantly more effective than bodyweight alone.

Takeaway: Now you’ve got the tools to train smarter—hit those glutes with purpose and specificity!

The single leg squat is one of the best exercises to target the gluteals

As seen in The Idaho Mountain Express May 4, 2025 https://www.mtexpress.com/wood_river_journal/features/fitness-guru-target-your-glutes-like-a-pro/article_367a235a-4a2b-4956-8847-2e7c0448ea7f.html

Fitness Guru: 6 key daily exercises for core and flexibility

  • By CONNIE ARONSON #fitnessguru

Daily habits can be powerful. Routine builds structure, helps us stay on track and use our time wisely. Adding a simple mini exercise program to your day is one way to succeed. For many of us, we’re missing some key exercises that can keep us flexible, injury-free and improve function. Here are six top core and flexibility exercises that will enhance your athletic performance. Whether you are a seasoned athlete, or simply just enjoy being active and don’t want to get injured, incorporate these moves into your day.

Activate the core: Heel-on-toe crunch

A woman is stretching on the floor with another person.
The heel-on-toe crunch targets the abdominals while limiting spine movement.
Photo courtesy of Connie Aronson

The core muscles help stabilize the spine and support movement. The following two core exercises build muscular fitness, have minimal movement, and are far more effective than a standard sit-up. To a viewer, it might not look like you’re doing much of anything, writes Stuart McGill in his book, “Back Mechanic,†but with proper technique, you should feel like you’re working.

  • Begin with your legs straight, left heel on top of right foot.
  • Bring your left hand behind your head for support, and lift your right arm straight up from your shoulder.
  • Curl up, raising your head, neck and shoulder blades off the mat, tightening your abdominals.
  • Hold for 10 seconds.
  • Slowly return to the start position. Six reps.

Side-lying hip lift

A woman is stretching on the floor with another person.
Side-lying hip lift. If you have a sensitive spine, bring the top foot ahead of the bottom foot.
Photo courtesy of Connie Aronson
  • To regress the move, lift from bent knees.
  • Lying on your right side with your top leg stacked, place your right elbow under your right shoulder.
  • Exhale and lift your right hip off the floor.
  • Hold for 10 counts.
  • Slowly lower to start. 6-8 reps. Switch sides.

Wall hamstring stretch

A woman is stretching on the floor with another person.
Wall hamstring Stretch. Slide the hips further down the wall for a greater range of motion.
You can increase the stretch, and involve more gastrocnemius, by taking the outside leg across the body.

The wall hamstring stretch is an effective way to stretch your hamstrings. The stability of the wall and prone position help you relax deeper into the stretch, and you can easily adjust the intensity by moving your hips further or closer to the wall. Tight hamstrings may be a sign of imbalances, such as an anterior pelvic tilt or tracking problems of the knee. The hamstrings start at the sit bones and attach on either side of the lower leg. The muscles act as guide ropes on the legs as the foot rolls inward or outward (pronation and supination).

  • Lie on the floor with the stretching leg on the corner of a wall or doorframe, with the other leg flat on the floor, heeled flexed.
  • Use a pillow for your neck if needed.
  • Move the hips closer or further from the wall to adjust the intensity.
  • Keep the bottom leg straight. If you can’t, bend the bottom knee.
  • Hold the stretch for 30 seconds and repeat two to three cycles on each leg. Tip: Squeezing the quads will increase the stretch.

Foam roller alignment

A woman is stretching on the floor with another person.

Reset your alignment every day by lying on a foam roller.

Lying lengthwise on a foam roller not only feels good but encourages good spinal length. If you’re hunched over with age, or are guilty of bending forward while scrolling on your phone, it can result in a “forward head.†For every inch that your head is forward, there’s 10 more pounds of pressure on the neck. Lengthening the lumbar erector spinal muscles helps encourage neutral alignment and good posture.

  • With your knees bent, lie on a roller, head supported and neck in a neutral position.
  • Tighten the abdominals.
  • Gently roll side to side for 20-30 seconds, two to three times.

Foam roller thoracic spine

A woman is stretching on the floor with another person.
Foam roller thoracic spine Photo courtesy of Connie Aronson

Using a foam roller on your thoracic spine helps upper back stiffness, as you can target the rhomboids and trapezius muscles. Rolling is a self-myofascial release technique that immediately relaxes sore spots and movement restrictions, allowing soft tissue and inflamed joints to rest and recover.

  • Place a foam roller under your shoulder blades or at bra height.
  • Support your head and tuck your chin.
  • Bend your knees, tilt the pelvis slightly and lift your hips and pelvis off the floor.
  • Gently roll on any tight or sore spots for 20-30 seconds.

Prayer stretch

A woman is stretching on the floor with another person.
Prayer stretch . Perform prayer stretch immediately after you’ve finished foam rolling any sore spots on the upper back. Photo courtesy of Connie Aronson
  • Kneel on the floor with your hands on a roller.
  • Slowly extend your arms forward, letting your chest move toward the floor.
  • Relax in the stretch for 20-30 seconds and repeat two to three times.
  • If you don’t have a roller, walk your hands forward, fully extending your arms, allowing your head to rest gently on the floor.

Check out https://www.mtexpress.com/wood_river_journal/features/fitness-guru-6-key-daily-exercises-for-core-and-flexibility/article_41acafc6-df2f-11ef-b349-9fac77851449.html

5 essential exercises you need

Featured

Daily habits can be powerful. Routine anchors us and builds resilience and health. Adding a routine or mini-structure to your day so that fewer decisions need to be made is one way to succeed. When it comes to your health, preventing injuries in any activity you enjoy is crucial. Here are five injury-preventing exercises to put on your habit list that don’t take up too much time. Whether you are a seasoned athlete, or simply just enjoy being active but don’t want to get hurt, incorporate these moves into your day.

Activate the core: Heel on toe crunch

A woman is stretching on the floor with another person.

A demonstration of the heel-on-toe crunch. Photo courtesy of Connie Aronson

The core muscles help stabilize the spine and support movement. The following two core exercises have minimal movement, and are far more effective than a standard sit-up. The heel-on-toe crunch spares the back, while building muscular fitness. You begin the crunch by stiffening the abdominal muscles and slightly raising the head and shoulders off the ground. Count to 10, then lower back down to the starting position. To a viewer it might not look like you’re doing much of anything, says Stuart McGill, but with proper technique, you should feel like you’re working.

  • Begin with your legs straight, left heel on top of right foot.
  • Bring your left hand behind your head for support, and lift your right arm straight up from your shoulder.
  • Curl up, raising your head, neck and shoulder blades off mat, tightening your abdominals.
  • Slowly return to the start position. 10 reps. Switch sides.

Side lying hip lift

A woman is stretching on the floor with another person.


A demonstration of the side-lying hip lift. Photo courtesy of Connie Aronson

  • Lying on your right side with your knees bent (or straight for advanced variation), place your right elbow under your right shoulder. Push your shoulder away from your ear to engage the shoulder girdle.
  • Avoid letting your rib cage slump toward floor; maintain natural curve of spine.
  • Exhale and lift your right hip off floor. Hold for 10 counts.
  • Slowly lower to start. 6-8 reps. Switch sides.

Stretch tight hamstrings

A woman is stretching on the floor with another person.


A demonstration of a hamstring stretch using a yoga strap.

Tightness in the back of your legs may be a sign of instability in your core, causing the leg muscles to overwork and shorten. As well, hamstrings are an important muscle to stretch if you have back pain, as they attach to the pelvis, which attaches to the back. An excellent stretch to ease the tension in the back of your legs is the hamstring stretch using a strap.

  • Lie on your back and place a yoga strap or rope under one foot, with the other leg straight, on the floor, heel flexed.
  • Slowly extend the leg toward straight.
  • If it is too difficult to completely straighten the leg, bend the opposite leg.

Foam roller alignment

A woman is stretching on the floor with another person.
Screenshot

Lying lengthwise on a foam roller not only feels good but encourages good spinal length. We’re all guilty of bending forward while scrolling on our phones, resulting in a “forward head.†For every inch that your head is forward there’s 10 more pounds of pressure on the neck. Reset your alignment every day by lying on a foam roller. Lengthening the lumbar erector spinal muscles helps encourage neutral alignment and good posture.

  • With your knees bent, lie on a roller, head supported and neck in a neutral position.
  • Tighten the abdominals.
  • Gently roll side to side for 20-30 seconds.

The sock test

A woman is stretching on the floor with another person.
A demonstration of the one-legged sock test.Photo courtesy of Connie Aronson
A woman is stretching on the floor with another person.

Losing your balance as you get older is no joke. Research has shown that the ability to stand on one foot drastically decreases after the age of 60, along with a rapid increase of falls and injury. The ability to stand on one leg is imperative for gait and function.

The sock test takes the exercise a step further. Practicing it is a fun challenge to build strength capacity and balance.

  • Holding a sock, stand on one leg, knee slightly bent.
  • Bring your right leg up toward you as you put your sock on
  • Lower the leg to the floor and repeat with your left foot.

https://www.mtexpress.com/wood_river_journal/features/5-essential-exercises-you-need/article_ddf5020a-75dc-11ef-b697-a329b921bf01.html#tncms-source=article-nav-next

Can you stand on one leg? Amazingly, it can affect longevity

If your core is strong, you typically have good balance. Standing on one leg engages the core, and that ability is an indicator of overall well-being.

One-leg balancing involves using all 29 muscles of the core, called the lumbo-pelvic hip complex. But did you know that standing on one leg for 10 seconds can predict longevity? A recent study shows that the link between balance and longevity is an indicator of survival among middle-aged and older adults. Those that couldn’t do this simple task faced a higher mortality risk over seven years, emphasizing the critical role of balance for our health as we age.

Losing your balance as you get older is no joke. Research has shown that the ability to stand on one foot drastically decreases after the age of 60, along with a rapid increase of falls and injury. The ability to stand on one leg is imperative for gait and function.

Practicing the single-leg balance also improves your proprioception, or your body’s awareness of its position in space. Many daily movements involve being on one foot, even briefly, such as climbing stairs, putting pants on and stepping into a tub. Having better balance means daily activities that require coordination don’t have to result in falls or missteps.

You might think standing on one leg is a simple movement, but the ankles, lower leg, thighs, hips and core work together to make it happen. Try the following moves to test your skills!

Single-leg balance

A woman is stretching on the floor with another person.
Single leg balance
Photo by Connie Aronson
  • Stand tall with your shoulders retracted. Feet are parallel and pointing forward. Hands are on the hips.
  • Brace the core, and flex the hips and knees slightly.
  • Lift one foot off the floor, keeping the toe of the raised foot pointed upward (dorsiflexed) and shift the center of your weight over the foot on the ground.
  • Maintain the slightly squat position for 10 seconds.
  • Return to the start; repeat on the opposite leg.
  • Tip: Keep the chin pushed back, with the head tilted neither forward or backward.

There are countless exercises to train balance. The following variation targets the gluteals and is a total body movement.

Single-leg balance and reach

A woman is stretching on the floor with another person.

Efficient movement requires appropriate levels of stability (standing on one leg), while simultaneously having appropriate levels of mobility (extending your leg outward). During this move you have to engage the stabilizers for good postural control as you move your leg. Because it is multiplanar (dynamic planes of motion), it correlates to movements in sports and daily activities.

  • Begin in a three-quarter squat, single-leg position as described for single-leg balance.
  • Maintaining balance, reach forward with the up leg and tap the floor with that foot.
  • Return back to neutral position.
  • Maintaining balance, reach out laterally with the same foot as far as possible, without compromising form. Tap the floor.
  • Return back to the start position.
  • Lastly, open your hip and reach to the side and behind you. Tap the floor and return to the starting position.
  • Continue with the same leg for four repetitions.
  • Repeat on the opposite leg.
A woman is stretching on the floor with another person.

Single leg balance on an unstable surface ( BOSU )

*Tip-try to keep the flat side of the BOSU level. This means that your weight is distributed throughout your whole foot

https://www.mtexpress.com/wood_river_journal/features/can-you-stand-on-one-leg-amazingly-it-can-affect-longevity/article_e1ed9822-083b-11ef-a7f2-278d85a49540.html

Do it right: How to stretch the external rotators of the hip

Hips move, as they are mobile joints just as your neck, shoulders and ankles are. All muscle helps us move and maintain our posture, especially the hip complex.

For many of us, we don’t stretch them enough and end up with tight hips, specifically the external rotators. If you do stretch regularly, you know that Pigeon Pose is an excellent hip and buttock stretch that can help you restore movement to these areas. But it can hurt sensitive knees, or be impeded by a current injury, as it requires the shinbone to be at a 45 degree angle beneath the front hipbone.

Hips need both good mobility and strength in every activity from walking to skiing. The main job of the external rotators of the hips is to stabilize the pelvis during the swing phase of walking. For example, when you step out on your right foot, as you transfer the weight into that foot, there is a moment in which you are standing on one leg.

As your foot and leg absorb your body weight, the hip internally rotates as you step. At the same time, the external rotators of the right hip tighten to keep the pelvis level to the ground as you swing your left foot through to step on it. This action slows down the knee as it moves toward the midline of the body, so your knees don’t collapse inward.

Good hip mobility and strength allow you to have better biomechanics from the hip down to the foot. Tight or weak hips affect not only a normal gait, but every activity that you enjoy doing.

A woman is stretching on the floor with another person.

Pigeon Pose

When your hips are too tight, you may feel crooked, sore, or admit to yourself that you really need to do some yoga. When your hips aren’t tight—particularly the posterior muscles of the rear—walking, getting out of the car, climbing stairs, or skiing can feel effortless.

Here are two variations to Pigeon Pose that you might like to add to your daily stretching routine.

A woman is stretching on the floor with another person.

1. Figure 4 stretch using the wall

Figure 4 is an excellent stretch for the external and internal hip rotators, including the piriformis and glutes.

Tip: The piriformis is one of the six external rotators of the hip. (The sciatic nerve runs over, under or through the piriformis muscle and can be responsible for sciatica pain.)

Lie on the floor, place your left foot on a wall, and place your right ankle over your left knee.

Let the right side of your pelvis drop away from your right shoulder until your pelvis becomes level.

Hold the stretch to release your hip rotators.

Stretch each side for 20-30 seconds, at least once a day.

A woman is stretching on the floor with another person.

2. Figure 4 stretch using a physio ball

  • all photos by Connie Aronson

Instructions are the same as the above stretch, ( stretch 1 ) except that you place one foot on a physio ball.

Using a physio ball allows you to create a deeper stretch by gently rolling the ball toward you with the foot that is placed on the ball.

As seen in The Idaho Mountain Express March 24, 2024

https://www.mtexpress.com/wood_river_journal/features/do-it-right-how-to-stretch-the-external-rotators-of-the-hip/article_96d925c4-dc97-11ee-9afc-cb569b10a505.html