5 essential exercises you need

Featured

Daily habits can be powerful. Routine anchors us and builds resilience and health. Adding a routine or mini-structure to your day so that fewer decisions need to be made is one way to succeed. When it comes to your health, preventing injuries in any activity you enjoy is crucial. Here are five injury-preventing exercises to put on your habit list that don’t take up too much time. Whether you are a seasoned athlete, or simply just enjoy being active but don’t want to get hurt, incorporate these moves into your day.

Activate the core: Heel on toe crunch
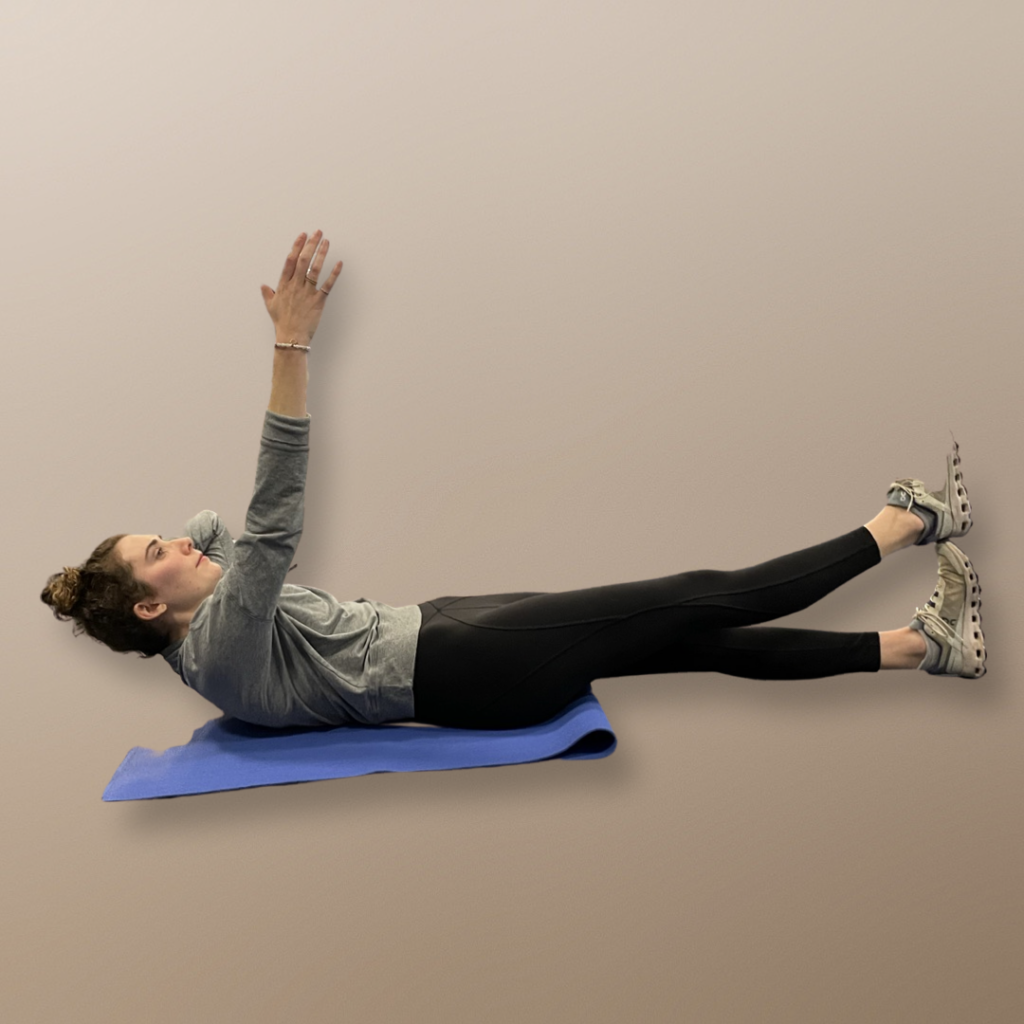
A demonstration of the heel-on-toe crunch. Photo courtesy of Connie Aronson

The core muscles help stabilize the spine and support movement. The following two core exercises have minimal movement, and are far more effective than a standard sit-up. The heel-on-toe crunch spares the back, while building muscular fitness. You begin the crunch by stiffening the abdominal muscles and slightly raising the head and shoulders off the ground. Count to 10, then lower back down to the starting position. To a viewer it might not look like you’re doing much of anything, says Stuart McGill, but with proper technique, you should feel like you’re working.

  • Begin with your legs straight, left heel on top of right foot.
  • Bring your left hand behind your head for support, and lift your right arm straight up from your shoulder.
  • Curl up, raising your head, neck and shoulder blades off mat, tightening your abdominals.
  • Slowly return to the start position. 10 reps. Switch sides.

Side lying hip lift
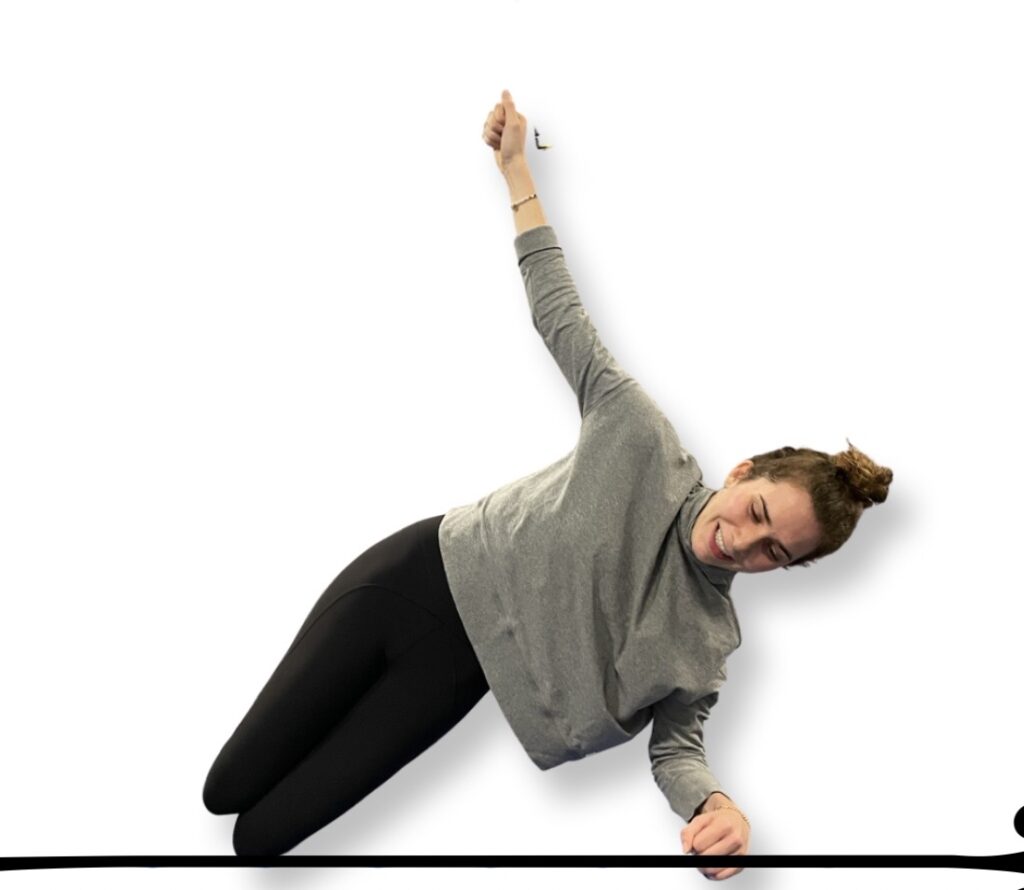

A demonstration of the side-lying hip lift. Photo courtesy of Connie Aronson

  • Lying on your right side with your knees bent (or straight for advanced variation), place your right elbow under your right shoulder. Push your shoulder away from your ear to engage the shoulder girdle.
  • Avoid letting your rib cage slump toward floor; maintain natural curve of spine.
  • Exhale and lift your right hip off floor. Hold for 10 counts.
  • Slowly lower to start. 6-8 reps. Switch sides.

Stretch tight hamstrings
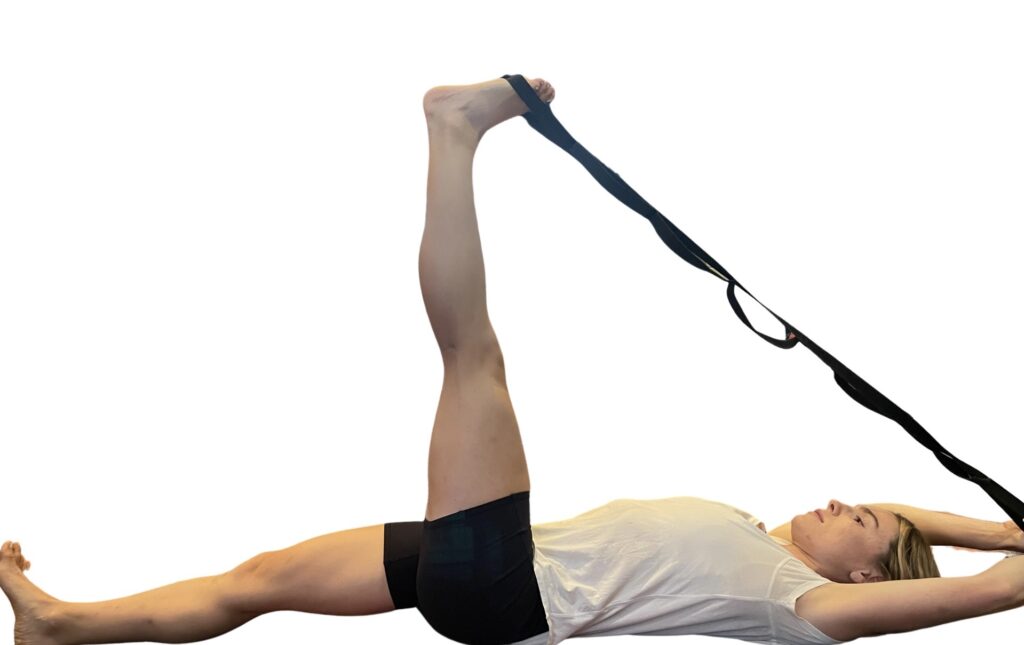

A demonstration of a hamstring stretch using a yoga strap.

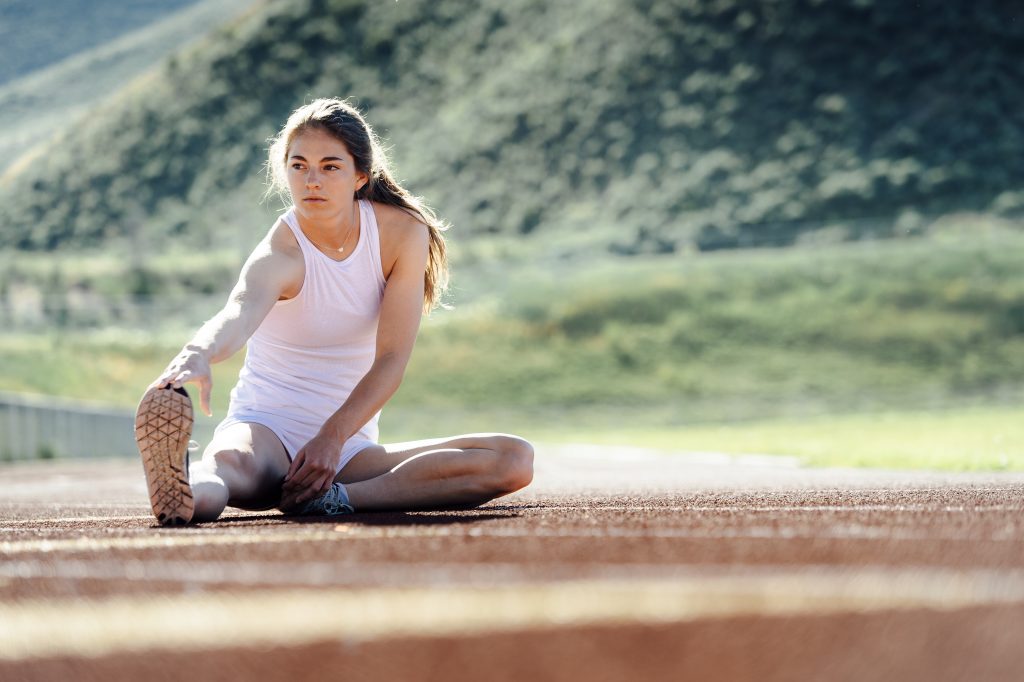
Tightness in the back of your legs may be a sign of instability in your core, causing the leg muscles to overwork and shorten. As well, hamstrings are an important muscle to stretch if you have back pain, as they attach to the pelvis, which attaches to the back. An excellent stretch to ease the tension in the back of your legs is the hamstring stretch using a strap.

  • Lie on your back and place a yoga strap or rope under one foot, with the other leg straight, on the floor, heel flexed.
  • Slowly extend the leg toward straight.
  • If it is too difficult to completely straighten the leg, bend the opposite leg.

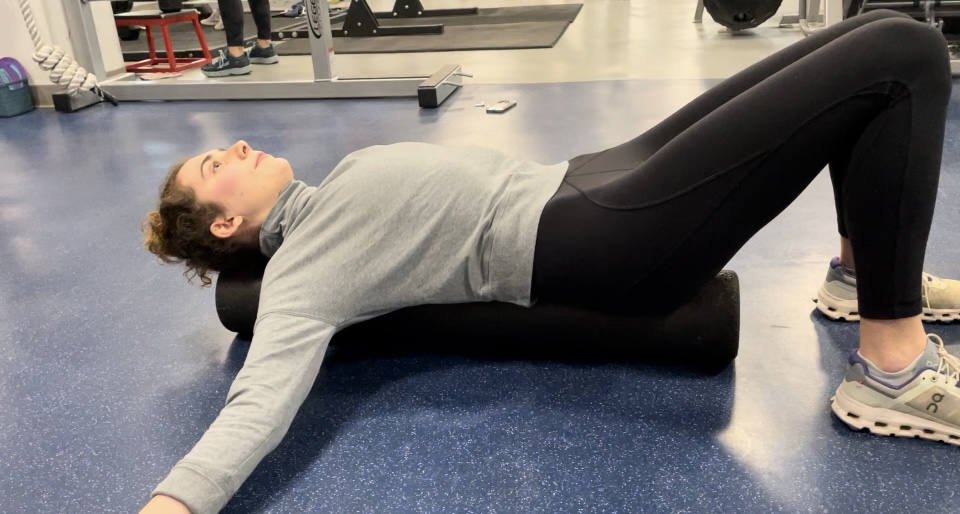
Foam roller alignment
Screenshot

Lying lengthwise on a foam roller not only feels good but encourages good spinal length. We’re all guilty of bending forward while scrolling on our phones, resulting in a “forward head.” For every inch that your head is forward there’s 10 more pounds of pressure on the neck. Reset your alignment every day by lying on a foam roller. Lengthening the lumbar erector spinal muscles helps encourage neutral alignment and good posture.

  • With your knees bent, lie on a roller, head supported and neck in a neutral position.
  • Tighten the abdominals.
  • Gently roll side to side for 20-30 seconds.

The sock test

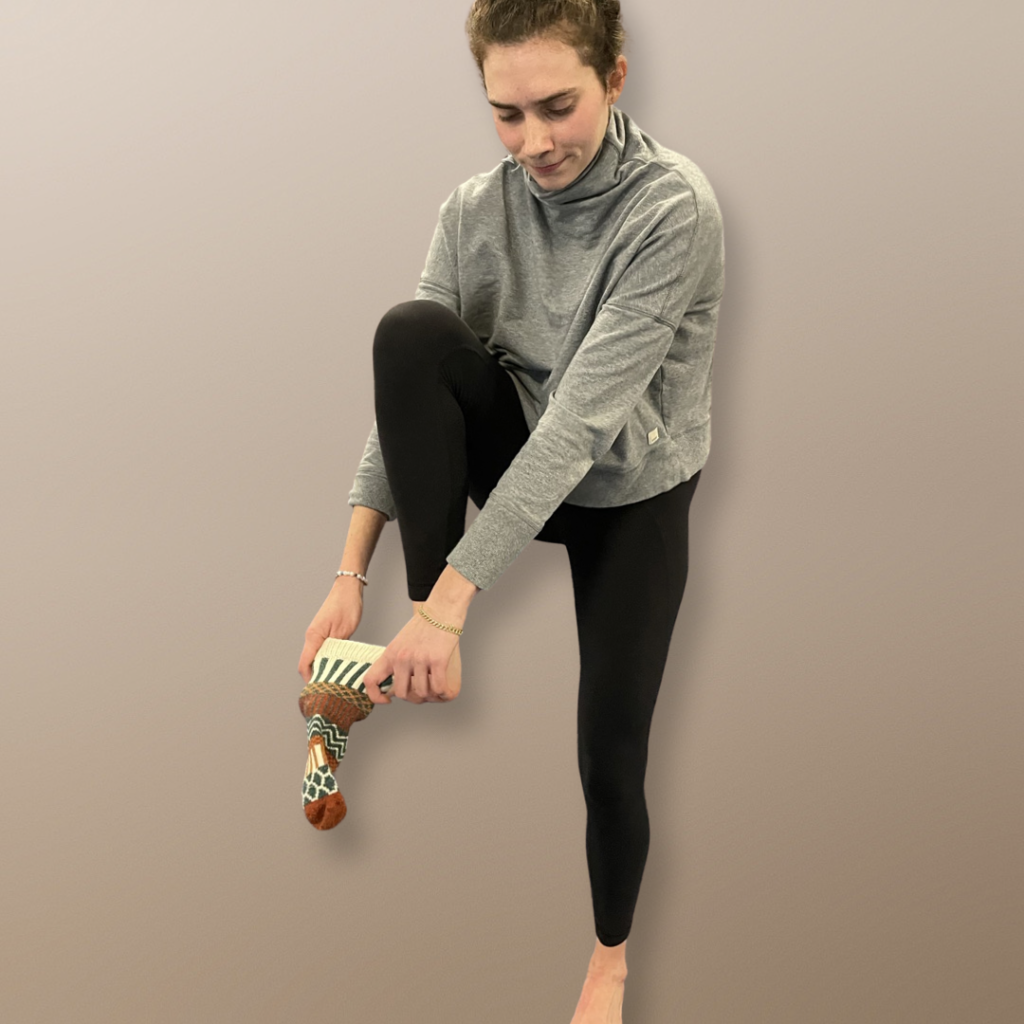
A demonstration of the one-legged sock test.Photo courtesy of Connie Aronson

Losing your balance as you get older is no joke. Research has shown that the ability to stand on one foot drastically decreases after the age of 60, along with a rapid increase of falls and injury. The ability to stand on one leg is imperative for gait and function.

The sock test takes the exercise a step further. Practicing it is a fun challenge to build strength capacity and balance.

  • Holding a sock, stand on one leg, knee slightly bent.
  • Bring your right leg up toward you as you put your sock on
  • Lower the leg to the floor and repeat with your left foot.

https://www.mtexpress.com/wood_river_journal/features/5-essential-exercises-you-need/article_ddf5020a-75dc-11ef-b697-a329b921bf01.html#tncms-source=article-nav-next

Work ( out ) from home

Featured

Try this new six-move fitness routine to break your pandemic rut

One way to feel better is to get back on a routine. The best approach to longevity, vitality and independence is through consistent exercise.

Did you ever imagine living through a pan- demic? More than ever, we’re all chal- lenged to be resilient. For many of us, our routines are shot and the new normal is still unfolding. One way to feel better is to get back on a routine. The best approach to longevity, vitality and independence is through consistent exercise.W

The human body has more than 635 muscles, 206 bones and 360 joints—an incredible wonder. Now is a good day to start taking good care of that wonder.

Here’s your arsenal, a creative, effective home program to help you get started or relight your pas- sion for a routine. Keep it short and sweet by pick- ing a few key muscle strengthening and flexibility/ mobility exercises. The following six moves use simple home exercise equipment: free weights or a milk jug, a golf ball and resistance bands. You can do the routine while catching up with the news or a show. Try to do each exercise for one minute and repeat the circuit twice.

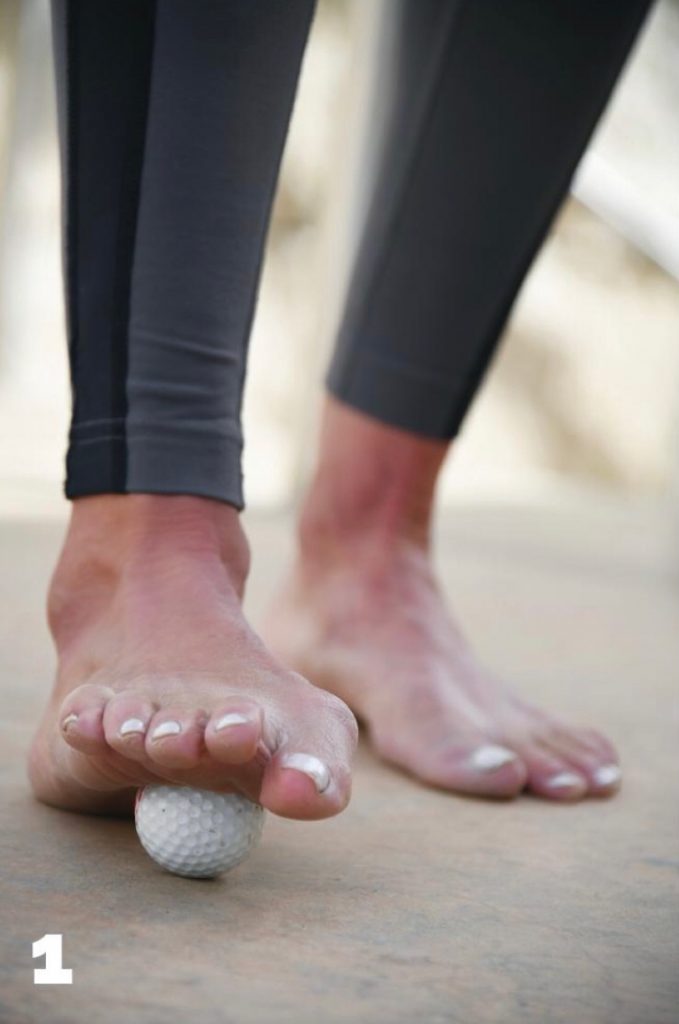
1. Golf ball roll

Massage your feet with the golf ball roll to reju- venate the plantar fascia on the underside of your foot. All the muscles of the lower leg attach on the bottom of your foot. This connective tissue can get irritated and sore if you tend to continually stand with your feet falling inward, or after a summer of wearing flip-flops. Also, if your ankles don’t bend easily in a squat, this self-myofascial release exercise will help.


Place a golf ball under each foot and roll it back and forth until you hit a sore spot. Don’t overdo it, but increase pressure on that particular spot until it feels better. If a golf ball is too uncomfortable, use a tennis ball instead.

One minute each foot, preferably daily.

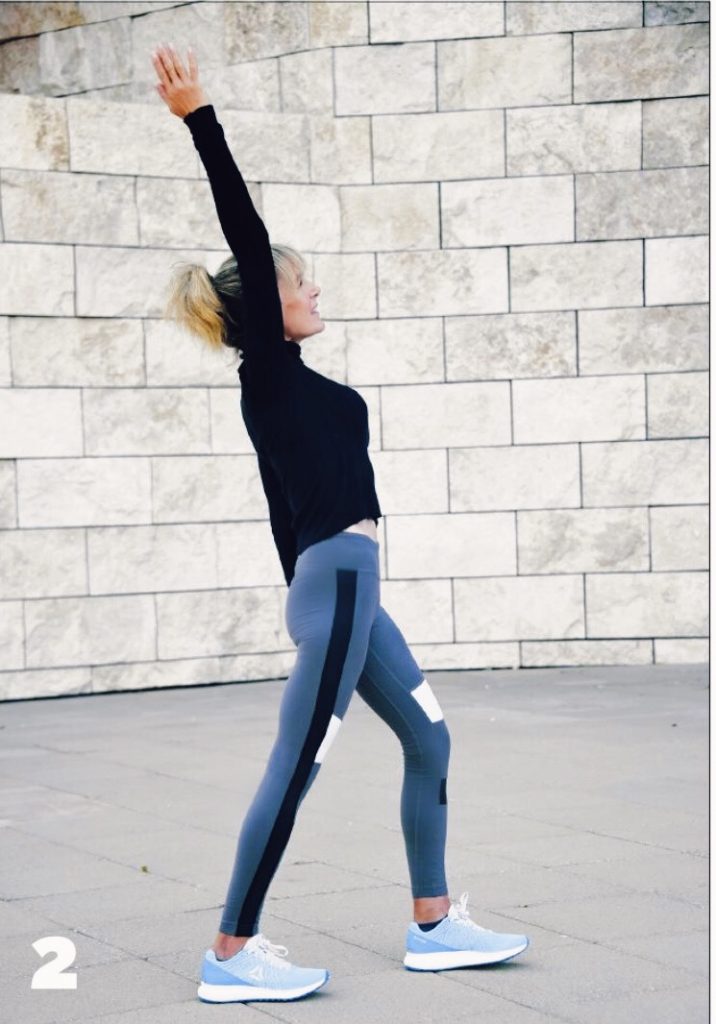
2. Step back with arm reach

Stretching your calf right after golf ball rolling helps immensely, as you’ll feel this stretch all the way up the back of your leg. This big bang-for-your- buck stretch targets the calf muscles, the hip flexors and the whole front body.


Start with your feet hip width apart and take a normal-size step back with the right leg. Simulta- neously fully extend the right arm up. Be sure the feet are placed straight forward. Keep your inner arches lifted and press down through your heel. Do three to four times and repeat on the left side.


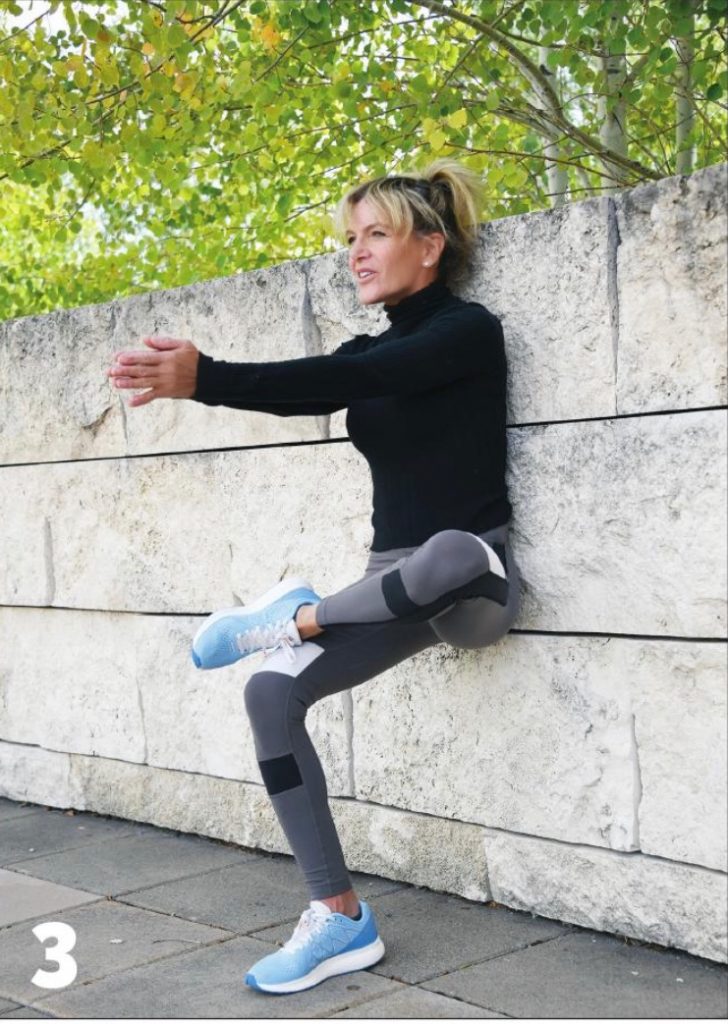
Strengthen all your leg muscles with this move. Lean back against a wall, knees slightly bent. Pick up your left leg and cross it over your right knee. Try not to laterally shift your hips more than an inch or two. Slide down until your knees are level with your hips. Extend your arms and hold posi- tion for as long as you can. Build up to one minute. Switch legs.

4. One-minute clamshell

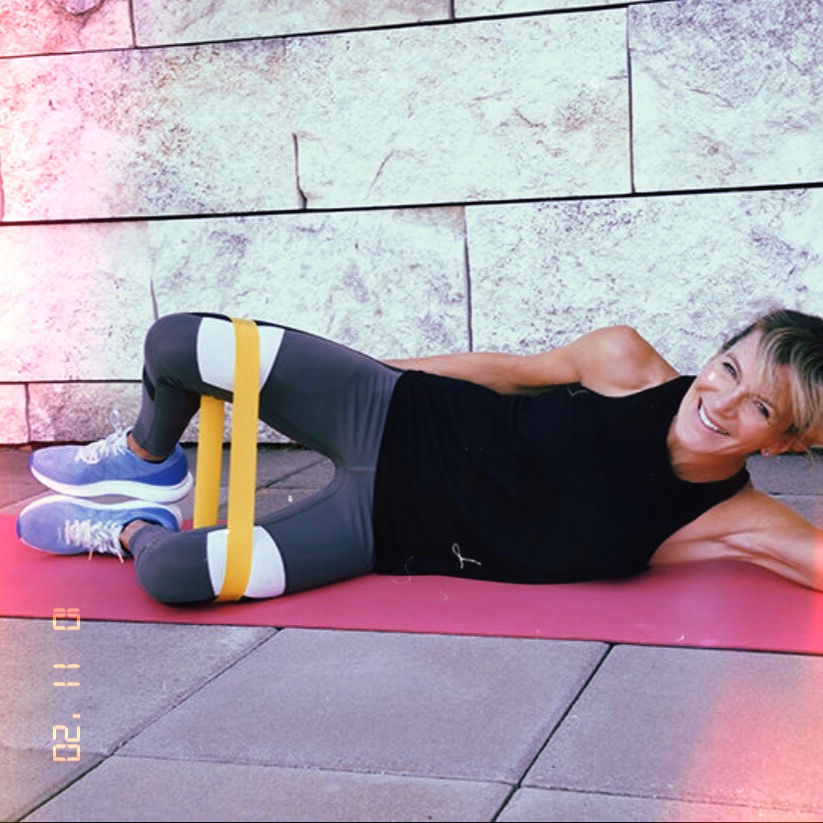
This is a time-tested favorite of clients who want the best butt exercises. The one-minute clamshell focuses on the gluteus maximus, an external rota- tor of the hips. This big muscle also pushes the hip forward. The glute maximus attaches to your lower leg via the IT band. When working properly, these muscles help to slow down pronation and internal leg rotation. In other words, if your butt muscles are weak, your knees will typically fall inward.

Place a mini-band above your knees. Lie down on your side, with knees bent and feet stacked on each other. Lift the top knee up, like an open clamshell, until there is tension on the band. Keep tension on the band for one minute. Repeat on the other side.

Tip: Minimize any spine or pelvic motion through strong abdominal bracing.

5. Single leg bridge with extension

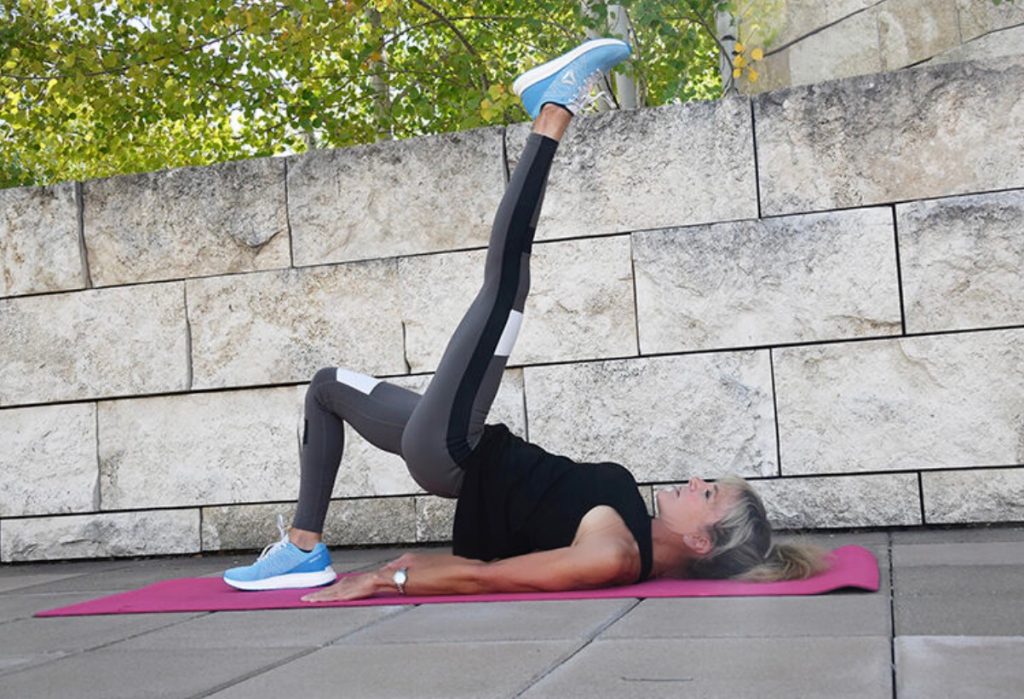
This is an important exercise for the lumbo-pel- vic hip area, the core. There are 29 muscles attached to this area and keeping your core strong is essen- tial for a strong and stable spine.

Lie face up on the floor with your knees bent. Feet are flat on the floor. Relax your arms by your side.
O

Simultaneously tighten the glutes and brace the core. Smoothly raise the hips off the floor until you form a straight line from your knees to your shoulders. Extend one leg out at knee height. Lift and lower the extended leg up towards the ceiling and back to knee height 10 times.

Tips: Focus on a powerful glute contraction. Keep the load on your shoulders, not your neck. Try not to rotate through the hips.

If you can’t fully extend in the bridge position, it could mean the hip flexors are tight. (Go back to move No. 2.)

6. Half kneeling halo

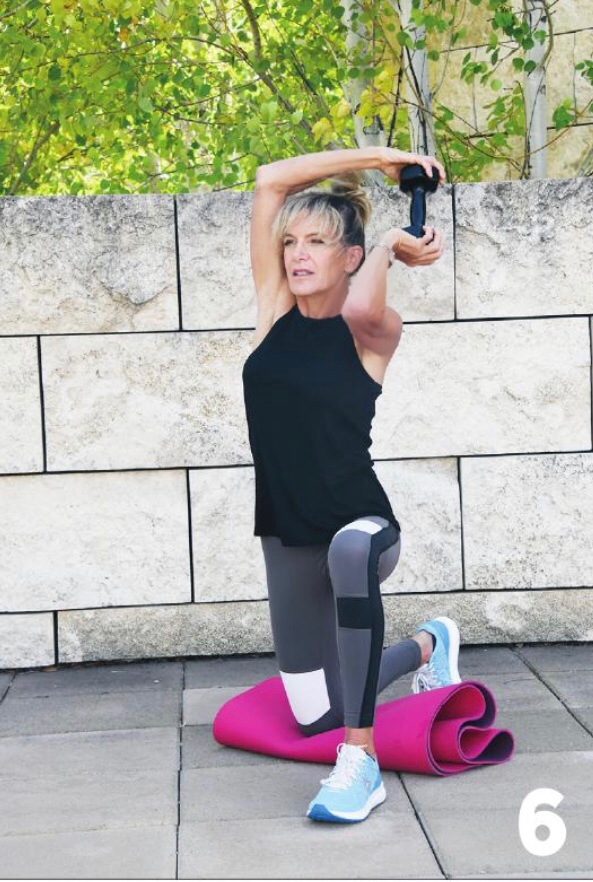
You can make a standing core exercise more effective by dropping to a kneeling position. When you kneel, you have to engage your core to keep balanced, as your knees can’t grip the ground in the same way your feet can when standing. Plus, by driving the back foot into the ground, you recruit more glute muscles. The half kneeling halo also allows for another great hip flexor stretch, interwoven into a great core and shoulder move.

Start in a kneeling position with a weight or milk jug in front of your chest, elbows pointed to the floor. Brace the core, and “trace” or halo the weight around the head. Keep the weight very close to your head. The weight makes a full revolution and ends directly in front of the chest, elbows pointing to the floor. Immediately repeat in the oppo- site direction.

Tip: A common mistake is for the weight to complete the halo, but not the elbows. Make sure the arms and elbows return to the start position. Keep the chin tucked. R

Connie Aronson is an ACSM Certified Exercise Physiologist and Cor- rective Exercise Specialist. Follow her at www.conniearonson.com and on Instagram @conniearon.

Published in the Idaho Mountain Express- Remote Living: A guide to the new normal October 7, 2020